
How Quickly Can Carpet Be Installed
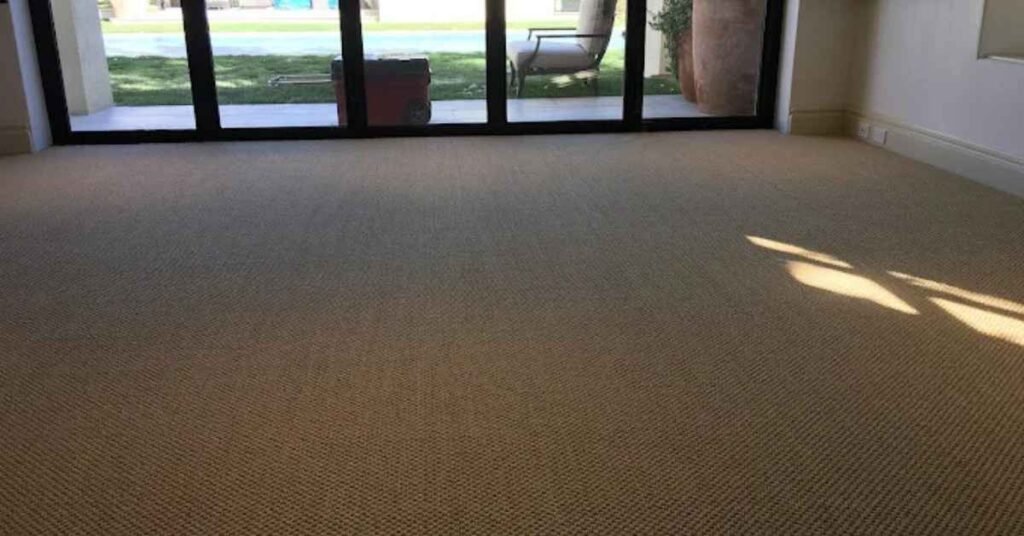
Installing a new carpet can completely change the look of any room. Many homeowners wonder how fast they can get the job done efficiently. Quick carpet installation is essential for those who want to enjoy their refreshed space without long delays. The time it takes depends on several factors including carpet type, room size, and the condition of the flooring underneath. Professional carpet installers can often complete jobs faster than DIY methods because they have the right tools and experience. Understanding the process and planning ahead helps reduce delays and ensures a smooth installation. This guide will explain the timelines, steps, and tips for fast carpet installation. Factors That Affect Carpet Installation Time Carpet installation time depends on the type and style of carpet you choose. Plush or thick carpets may take slightly longer to install than low-pile or commercial carpets. The size of the room also affects the timeline. A small bedroom can often be completed within a few hours, while larger areas may require a full day or more. Removing old flooring or preparing the subfloor adds extra time to the project. Professionals ensure the carpet is stretched and secured properly. Quick carpet installation is possible when all necessary preparations are completed before the installers arrive. Planning ahead can significantly reduce overall installation time. Step-by-Step Carpet Installation Process The steps involved in carpet installation are straightforward but require careful attention. First, any existing flooring must be removed carefully to avoid damage. Then, the subfloor is cleaned and prepped for the new carpet. Installing a padding layer is critical for comfort and carpet longevity. Next, the carpet is cut and fitted precisely for the room dimensions. Stretching and securing the carpet prevents wrinkles and bumps. Finally, finishing touches like trimming edges and sealing seams ensure a professional look. The Carpet Man makes quick carpet installation more achievable when these steps are done efficiently and in the right sequence by trained installers. Key Factors That Influence Installation Speed Several factors influence how fast carpet installation can occur in residential homes. Room shape and layout play a significant role because corners and odd angles take extra time to measure and cut. Furniture removal before installation is necessary to avoid obstacles. Carpet type also matters as synthetic fibers can be easier to handle than natural materials like wool. Weather conditions can indirectly affect the installation process, especially if humidity impacts the adhesive or padding. By considering these factors, homeowners can schedule professional services for a timeline that suits their needs. Quick carpet installation becomes more predictable with proper planning and clear communication with contractors. Benefits of Hiring Professional Carpet Installers Hiring professional installers is one of the best ways to guarantee quick carpet installation. Professionals bring specialized tools such as stretchers, cutters, and knee kickers. Their experience allows them to work efficiently without sacrificing quality. Additionally, they can advise on carpet types, padding, and layouts that save time. Scheduling an appointment during off-peak hours can also reduce delays. Preparing the room by clearing furniture and measuring spaces beforehand helps the process run smoothly. By choosing the right installers and providing preparation support, homeowners can enjoy a fast, seamless carpet installation experience that minimizes disruption in their daily life. Tips to Speed Up Carpet Installation Homeowners can also take simple steps to speed up carpet installation. Clear all furniture from the room to give installers easy access. Remove any old carpet or flooring beforehand to save time. Measure the space accurately to avoid errors and additional cuts. Choose carpet styles and padding that are easier to handle and install. Communicate with your installer about the timeline and any special requirements. By taking these proactive steps, quick carpet installation becomes achievable without compromising quality. Efficient planning and professional support ensure the process is smooth and results in a clean, attractive, comfortable new carpet for any home. Frequently Asked Questions About Carpet Installation How long does a small bedroom carpet installation take? Installing carpet in a small bedroom usually takes around two to four hours. The exact time depends on the room layout, carpet type, and whether old flooring needs removal. Professionals can often complete the job efficiently within this timeframe. Can I install carpet myself quickly? DIY carpet installation is possible, but it usually takes longer than hiring professionals. Without proper tools and experience, mistakes can happen, which may delay the process. Professional installers work faster and ensure a high-quality result. Does removing old carpet affect the installation time? Yes, removing old carpet adds extra time to the project. The condition of the subfloor and any repairs required can also influence how long installation takes. Preparing the floor beforehand helps speed up the process. How soon can I walk on newly installed carpet? Most carpets are ready to walk on immediately after installation. However, heavy furniture should be placed carefully after twenty-four hours to avoid indentations. Proper padding and stretching ensure long-lasting results. Does carpet type change installation speed? Yes, the type of carpet significantly affects installation time. Thick or plush carpets take longer to fit and stretch compared to low-pile synthetic options. Choosing simpler carpet styles can speed up the process. Conclusion: Planning for Quick Carpet Installation Understanding the process, factors, and tips ensures a faster carpet installation experience. Homeowners who plan ahead and hire professional installers can enjoy high-quality results with minimal disruption. Quick carpet installation saves time, improves comfort, and enhances the overall look of any space. By following the steps and advice shared in this guide, anyone can ensure a smooth, efficient carpet installation process that meets their schedule and design goals. Make Carpet Installation Easy with The Carpet Man Looking to refresh your home with stunning new carpet? The Carpet Man is here to make the process simple and stress-free. From helping you choose the perfect carpet to delivering a flawless installation, our experienced team handles every detail with care and precision. We focus on quality, efficiency, and customer satisfaction so you can enjoy your updated space without
Things to Consider When Installing Commercial Carpet
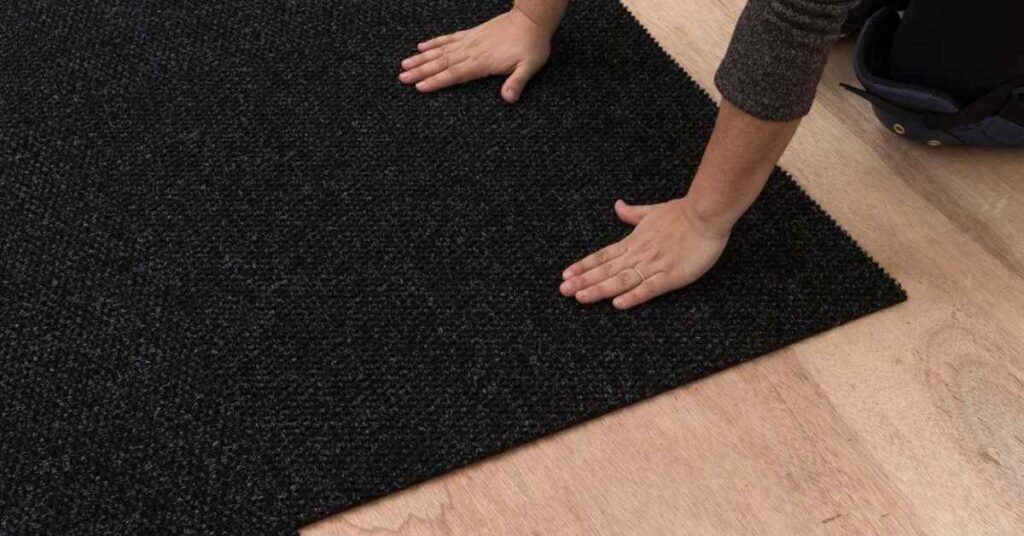
Installing commercial carpet can completely transform your office, retail, or industrial space. Choosing the right carpet affects aesthetics, comfort, and productivity. Business owners often overlook factors like durability, traffic level, and maintenance, which are essential for long-term satisfaction. Professional guidance, including industrial carpet installation, ensures that the carpet performs well and looks great. Understanding carpet materials, installation techniques, and maintenance strategies makes a big difference in results. Planning carefully also helps avoid costly mistakes and replacements. For any commercial project, investing in the right flooring ensures safety, durability, and a welcoming environment for employees and customers. Understanding Industrial Carpet Installation Industrial carpet installation is the process of professionally fitting durable carpets in commercial spaces. It requires careful planning, accurate measurements, and expert techniques. This installation method ensures carpets lay flat, align correctly, and remain safe in high-traffic areas. Businesses benefit from hiring certified installers who know proper adhesive use, padding, and seam finishing. carpet installation is essential for offices, retail stores, and warehouses where durability matters. Choosing the right installer guarantees long-lasting performance and protects warranties. High-quality carpets combined with proper installation improve appearance and safety. Without professional installation, carpets may wear unevenly or develop wrinkles, leading to additional costs. Choosing the Right Commercial Carpet Selecting the right carpet type is critical for long-lasting results. Nylon carpets are highly durable, stain-resistant, and ideal for high-traffic zones. Polyester offers softness and affordability for moderate-traffic areas. Olefin is moisture-resistant, making it suitable for entrances or conference rooms. Carpet tiles provide flexibility and easy replacement without disturbing the whole floor. Pile types, such as loop, cut, or cut-loop, affect comfort and wear. Color and patterns help hide stains and improve office aesthetics. Consulting with a professional installer, like The Carpet Man, ensures the carpet meets both functional and visual needs. Industrial carpet installation guarantees these selections are properly fitted. Assessing Business Needs Before installing commercial carpet, assess your business requirements. High-traffic areas require durable, low-maintenance flooring. Offices, retail spaces, and industrial sites have different wear patterns. Maintenance frequency, cleaning routines, and budget must be considered. Investing in quality materials saves money in the long term. Consulting with commercial carpet contractors helps select the best carpet for your environment. Proper planning ensures functional, attractive, and safe flooring. Industrial carpet installation is particularly important in areas that see constant foot traffic. Making informed choices improves employee satisfaction and customer impressions. Professional Installation vs DIY carpet installation should be done by trained professionals. Improper DIY installation can lead to uneven surfaces, wrinkles, and safety hazards. Certified installers use proper tools and techniques to align seams and secure adhesives. Professional installation extends carpet lifespan and maintains warranty coverage. It also ensures padding, moisture barriers, and edge finishing are correctly applied. Hiring professionals guarantees that carpets perform well and look polished. Industrial carpet installation is an investment in safety, durability, and aesthetics. DIY approaches often result in costly errors that professionals can avoid. Preparing the Space Proper preparation of the installation area ensures success. Old flooring should be removed, and subfloors cleaned and leveled. Moisture checks prevent adhesive failure and mold growth. Furniture layout planning minimizes disruption during installation. Preparation reduces time, improves results, and supports longevity. Industrial carpet installation works best when all necessary steps are completed beforehand. Professional contractors provide guidance for complex spaces with obstacles. Skipping these steps can lead to uneven wear or poor performance. Prepared spaces guarantee that commercial carpets remain functional, safe, and visually appealing for years. Maintenance and Longevity Tips Regular maintenance extends the life of commercial carpets. Vacuuming removes dirt and debris that cause wear. Spot cleaning prevents stains from setting permanently. Deep cleaning every few months restores color and freshness. Carpet protectors in high-traffic zones help reduce damage. Durable materials simplify maintenance tasks. Following a maintenance schedule improves office aesthetics, employee satisfaction, and customer impressions. Proper care ensures long-lasting performance and keeps carpets looking fresh. Well-maintained carpets also preserve warranties and reduce future replacement costs. Eco-Friendly Options Eco-friendly carpets support sustainability without compromising durability. Recycled carpets reduce environmental impact while remaining strong. Low-VOC carpets improve indoor air quality for employees and visitors. Contractors recommend environmentally responsible options suitable for high-traffic spaces. Combining sustainable materials with industrial carpet installation ensures performance, safety, and comfort. Choosing eco-friendly solutions reflects corporate values while promoting a healthier work environment. Businesses benefit from long-lasting, durable, and environmentally conscious flooring options. FAQs What is industrial carpet installation? Industrial carpet installation is the professional process of fitting durable carpets in commercial spaces. It ensures proper alignment, safety, and long-term performance. How long does commercial carpet last? With proper care, commercial carpets last ten to fifteen years. Regular maintenance significantly extends durability. Can I install commercial carpet myself? DIY installation is not recommended because it can cause wrinkles, safety hazards, and void warranties. Professionals ensure proper results. What type of carpet is best for offices? Nylon and polyester carpets are durable, stain-resistant, and cost-effective for high-traffic commercial areas. How often should commercial carpets be cleaned? Vacuum regularly and schedule professional deep cleaning every three to six months to maintain quality and longevity. Get Your Commercial Carpet Today If you need professional commercial carpet installation for your office, retail, or industrial space, contact The Carpet Man today. Our experienced team ensures proper fitting, durability, and a polished look for any commercial project. You can reach us at 720-850-3316 or email thecarpetmannm@gmail.com for a consultation or quote. If you prefer to buy your carpet directly, visit our Carpet Stores in Santa Fe, where we offer a wide selection of high-quality carpets ready for your space. Let The Carpet Man handle your flooring needs with expertise and care.
Best Flooring Materials for Santa Fe Homes
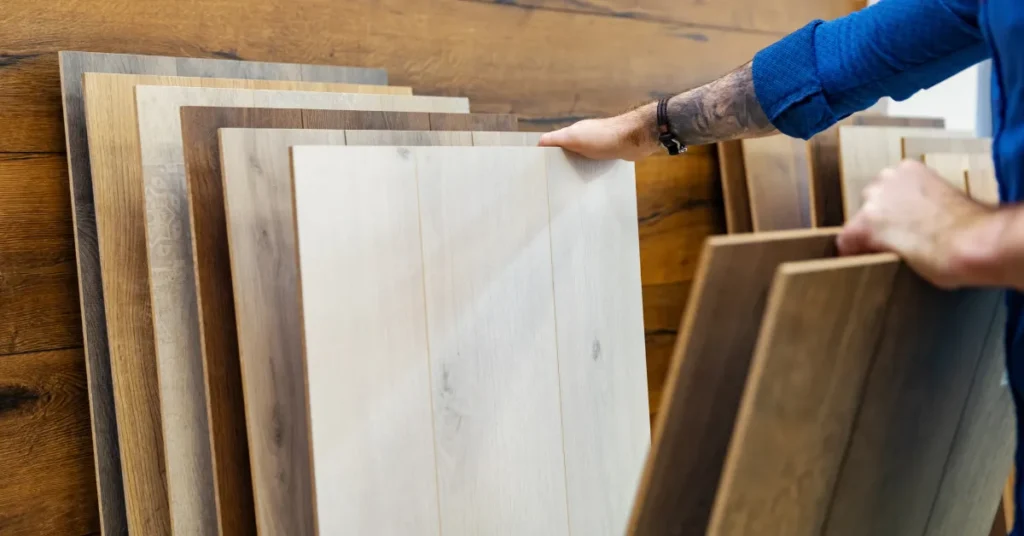
Choosing the perfect flooring for your Santa Fe home can completely change its appearance and comfort. Homeowners usually consider durability, style, maintenance, and cost when selecting flooring. Santa Fe’s climate is generally dry with plenty of sunshine, which impacts the type of flooring suitable for local homes. Some materials may expand, contract, or crack if not chosen carefully. Visiting flooring stores Santa Fe allows homeowners to examine textures, colors, and durability firsthand. Understanding the best flooring materials ensures a long-term investment that looks great and lasts. Flooring should match the home’s interior design while providing comfort and functionality for all rooms. Factors to Consider When Choosing Flooring in Santa Fe Climate and Temperature Santa Fe experiences hot summers, mild winters, and generally dry conditions. Flooring materials can expand, contract, or warp if climate conditions are not considered. Tile and vinyl are excellent options because they handle heat well and resist moisture damage. Hardwood needs proper sealing to prevent cracks or splits. Bamboo and cork are eco-friendly choices that also adapt to climate changes. Considering climate ensures your flooring will maintain beauty and durability over the years. Visiting flooring stores Santa Fe helps homeowners understand which materials perform best in this environment. Professionals there can suggest suitable options for each room of your home. Durability and Maintenance Durability is a key factor when choosing flooring for a Santa Fe home. Hardwood, tile, and vinyl offer long-lasting performance and resist wear. Carpet and laminate may require more frequent maintenance but are suitable for specific areas. Some materials need refinishing or sealing to keep them looking new. Homeowners often prefer low-maintenance flooring to save time and effort. Flooring stores Santa Fe can provide expert advice about long-term care and maintenance requirements for each material. Understanding durability ensures you choose flooring that fits your lifestyle and stands up to everyday use while remaining attractive. Style and Aesthetic Flooring should complement your home’s interior style, especially in Southwestern-inspired Santa Fe homes. Warm, earthy tones are popular and blend with local architectural features. Tile can offer patterns or natural stone looks for high-impact design. Hardwood floors add elegance and timeless beauty. Vinyl and laminate provide versatile styles at a lower cost. Flooring stores Santa Fe offer a variety of samples to help homeowners match textures and colors. Selecting the right style creates a cohesive interior design and increases the home’s appeal while providing a comfortable living environment for family and guests. Best Flooring Materials for Santa Fe Homes Hardwood Flooring Hardwood flooring is a classic choice known for elegance and durability. Popular options include oak, maple, and hickory, which can withstand years of use. Hardwood adds warmth and charm to living rooms and bedrooms. Sealing is essential in Santa Fe’s dry climate to prevent cracking. Maintenance involves regular sweeping, occasional refinishing, and avoiding direct sunlight. Hardwood offers a long-term investment with timeless appeal. Many flooring stores Santa Fe carry a wide range of hardwood options with installation services, helping homeowners choose materials that suit their home style and budget while ensuring long-lasting beauty. Tile Flooring Tile is perfect for heat-resistant, low-maintenance flooring in kitchens, bathrooms, and high-traffic areas. Ceramic, porcelain, and natural stone options provide durability and aesthetic appeal. Tile stays cool during hot Santa Fe summers and is easy to clean. Stone tiles, like travertine or slate, are ideal for Southwestern-style homes. Choosing grout colors carefully can enhance the overall look of the flooring. Flooring stores Santa Fe offer a variety of tile options and professional installation services. Proper sealing ensures longevity, and homeowners can enjoy a stylish and functional floor that lasts for years while complementing their interior design. Laminate Flooring Laminate flooring is an affordable alternative to hardwood with similar visual appeal. It resists scratches, stains, and general wear, making it ideal for busy homes. Laminate can mimic wood or stone while offering quick installation options. Homeowners save on both material and labor costs. Maintenance is simple, requiring sweeping and occasional damp mopping. Many flooring stores Santa Fe provide laminate options with warranties and support. Its versatility allows for a stylish appearance without the higher cost of hardwood. Laminate is practical for living areas, bedrooms, and even kitchens, depending on the water-resistance level. Vinyl Flooring Vinyl flooring is versatile, waterproof, and cost-effective. Luxury vinyl planks resemble wood or stone while providing moisture resistance. Vinyl is soft underfoot, comfortable, and suitable for kitchens, bathrooms, or laundry rooms. It can withstand high traffic and maintain its appearance over time. Modern vinyl comes in various colors, patterns, and textures for design flexibility. Flooring stores Santa Fe showcase multiple vinyl options for homeowners to test in natural light. Cleaning is easy with non-abrasive solutions, and proper care ensures long-lasting beauty and durability. Vinyl is a great combination of comfort, style, and practicality. Carpet Flooring Carpet is a comfortable and cozy flooring choice, perfect for bedrooms and living rooms. It reduces noise, adds warmth, and provides a soft surface underfoot. Modern carpets come in stain-resistant fibers for easy cleaning and maintenance. Carpet is ideal for colder months, adding insulation and comfort. Choosing the right color and texture complements other flooring materials and interior décor. Flooring stores Santa Fe offer a wide variety of carpet styles and professional installation. Regular vacuuming and occasional deep cleaning maintain hygiene and extend the life of your carpet, ensuring a soft and attractive surface. Eco-Friendly Options: Cork and Bamboo Cork and bamboo are sustainable, durable, and stylish flooring options. Cork absorbs sound and provides a soft, warm surface. Bamboo is strong, renewable, and modern, offering a sleek appearance for any room. Both materials are suitable for moderate humidity levels found in Santa Fe. Eco-friendly options appeal to environmentally conscious homeowners. Many flooring stores Santa Fe now stock cork and bamboo, allowing customers to see samples before purchasing. Proper care includes sweeping and damp mopping, keeping surfaces clean and beautiful. Sustainable flooring combines style, comfort, and responsibility for your home. Where to Find the Best Flooring Stores in Santa Fe Finding reliable flooring
The Best Flooring Options for Open-Plan Living Spaces

Open-plan homes have become a favorite in modern house design. Many homeowners love how open layouts make spaces feel larger, brighter, and more welcoming. Choosing the right flooring plays a crucial role in connecting different zones while maintaining style. The flooring you select can influence the room’s warmth, comfort, and overall aesthetic appeal. Many people overlook this aspect, focusing only on furniture and paint. However, a well-chosen floor enhances daily life, creates continuity, and can even increase home value. Understanding flooring types, durability, and visual appeal ensures homeowners make a smart decision. A carefully designed living space floor plan maximizes functionality and style beautifully, while selecting the right open-plan living flooring ties the entire home together seamlessly. Hardwood Flooring for Continuity and Warmth When planning renovations or new builds, considering a living space floor plan helps greatly. The layout determines how flooring flows from one area to another seamlessly. Hardwood floors remain a top choice due to their timeless elegance, durability, and warmth. Oak, maple, and hickory are popular options in American homes. Hardwood works well in living rooms, dining areas, and even hallways connecting rooms. Light-colored wood can make spaces feel airy and open. Engineered wood offers the same appearance but adds moisture resistance, ideal for kitchens. Installing matching floors in multiple zones maintains a cohesive, visually appealing environment. Flooring experts recommend coordinating colors with walls and furniture for harmony. Laminate Flooring for Affordable Style Laminate flooring provides an affordable, durable alternative for open-plan layouts. It resists scratches and stains while offering numerous design options. Modern laminate can mimic hardwood, stone, or tile, providing style flexibility. It’s easy installation makes it attractive for DIY enthusiasts and professional contractors alike. Laminate is particularly suited to high-traffic areas in large open spaces. It also allows for smooth transitions between different rooms without complex adjustments. Choosing the right finish and texture ensures safety and comfort underfoot. Pairing laminate with area rugs can define zones within a single living space floor plan. Proper underlayment enhances insulation, soundproofing, and comfort for everyday use. Vinyl Flooring for Durability and Versatility Vinyl flooring has grown in popularity due to its versatility and water resistance. Luxury vinyl planks imitate hardwood, adding style without high costs. Vinyl is suitable for kitchens, living rooms, and laundry areas where moisture is common. Its durability withstands pets, kids, and frequent foot traffic effectively. Vinyl also offers easy maintenance, requiring only sweeping and occasional mopping. Modern options include click-lock installation for quick setup and minimal mess. Patterns and colors are nearly endless, allowing homeowners to match any interior theme. Vinyl can complement natural light and create visually appealing zones within open spaces. Proper installation prevents gaps, moisture damage, and uneven surfaces. Tile Flooring for Longevity and Easy Maintenance Tile remains a reliable flooring option, especially for modern open layouts. Porcelain and ceramic tiles offer water resistance, longevity, and easy maintenance. Tiles come in various sizes, shapes, and colors for personalized design ideas. Large-format tiles make rooms appear more spacious and continuous. Textured tiles improve safety by reducing slip risks in wet areas. Combining tile with rugs or wood zones creates functional separation without breaking visual flow. Tiles handle temperature changes well and can work with radiant heating systems. They are ideal for kitchens, bathrooms, and entryways where durability matters. Careful grout selection ensures a seamless appearance and minimal maintenance. Living space floor plan zoning can benefit from tile placement strategies effectively. Carpet Flooring for Comfort and Noise Reduction Carpet is another flooring option that provides warmth and comfort underfoot. In open-plan spaces, carpet can help define lounge areas or reading corners effectively. Modern carpets are available in stain-resistant fibers suitable for pets and children. Neutral tones maintain continuity with hardwood, laminate, or tile surroundings. Carpets also reduce noise, adding coziness to otherwise large, echo-prone spaces. Layering area rugs over hardwood or laminate adds texture, style, and warmth. Choosing low-pile carpets ensures easy cleaning while maintaining comfort. Designers often combine carpet with hard flooring to create visual separation naturally. Proper padding enhances longevity and adds cushioning for daily activities. Frequently Asked Questions What is the best flooring for open-plan living areas? Hardwood or laminate flooring is usually preferred for open-plan spaces. They offer style, durability, and smooth continuity across different zones. Can I mix different flooring types in a living space floor plan? Yes, mixing wood, tile, or carpet areas can define zones effectively. The Carpet Man recommends coordinating colors for a seamless look. Is vinyl flooring suitable for high-traffic spaces? Absolutely, vinyl is water-resistant, durable, and easy to maintain. It works well in kitchens, hallways, and family areas. How can I define zones in an open-plan layout? Rugs, varied flooring materials, or furniture placement can separate spaces naturally. This helps create functional and visually distinct areas. Do I need professional help to install open-plan flooring? Professional installation ensures proper alignment and longevity. Experts also prevent moisture, gaps, or uneven surfaces. Need Flooring Services for Your Living Space? If you are looking to upgrade or install new flooring in your home, The Carpet Man is here to help. We provide expert guidance on selecting the perfect flooring for your living space floor plan. Our team ensures high-quality installation with durability and style in mind. Contact us today to transform your open-plan living areas with beautiful, long-lasting floors. Call us at 505-780-8472 or email thecarpetmannm@gmail.com to schedule a consultation or request a free estimate.
What to Expect from a Full-Service Carpet Installation
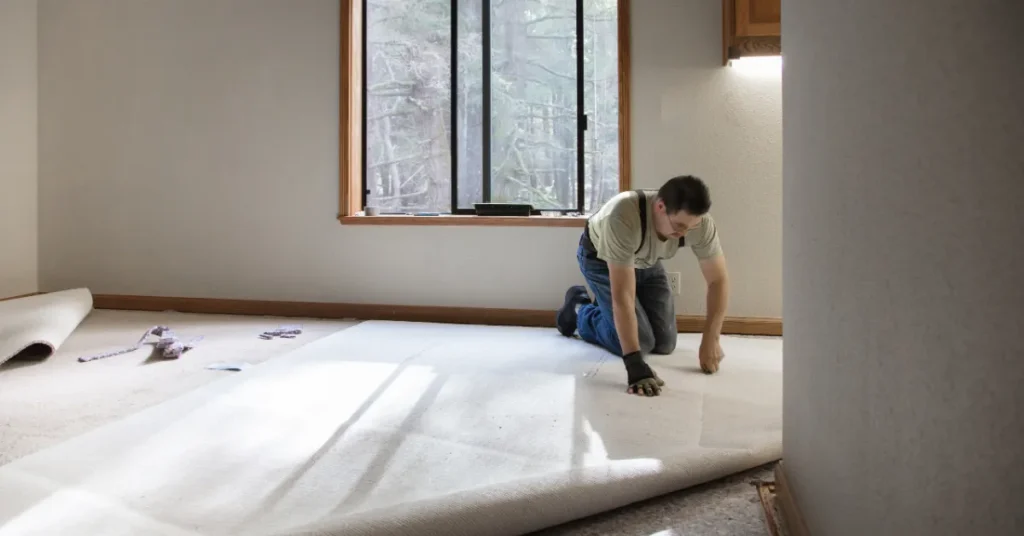
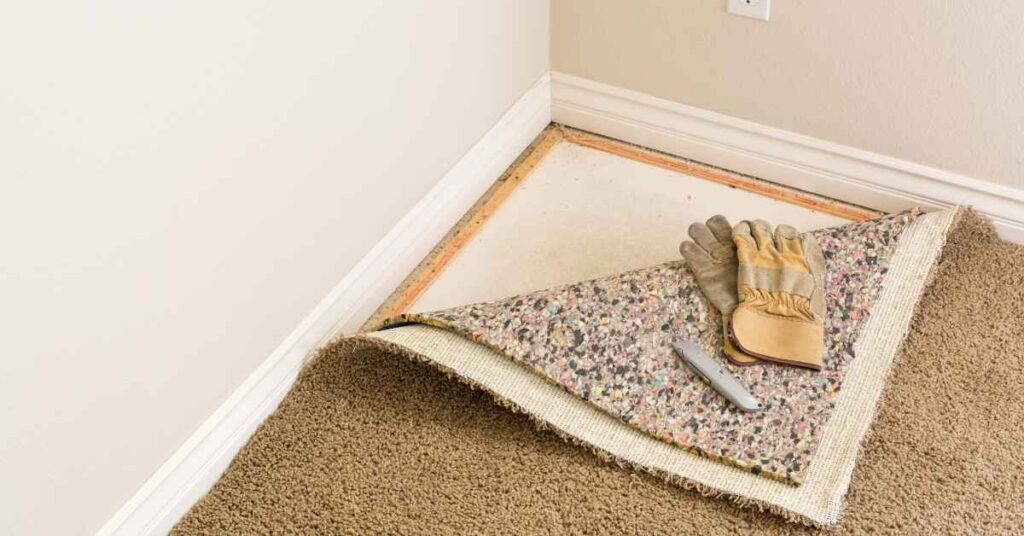
Carpet installation can feel overwhelming without guidance or experience. Hiring Professional carpet installation ensures your flooring is installed correctly, efficiently, and safely. Professionals handle every step from preparation to finishing touches. This includes choosing the right materials, measuring the room, removing old flooring, and laying the carpet flawlessly. Residential carpet installation or commercial carpet installation benefits greatly from expert handling. Skilled teams prevent wrinkles, misalignment, and improper seams. Homeowners enjoy long-lasting carpets that are comfortable and visually appealing. Professional carpet installation also provides advice on maintenance, cleaning, and warranty. Understanding the process helps you set expectations and ensures satisfaction throughout the project. Preparing for Carpet Installation Preparation is crucial for a smooth and efficient carpet installation. Before Professional carpet installation begins, clear furniture and belongings from the room. Inspect the subfloor to check for damage or uneven surfaces. Accurate measurements are essential for both residential carpet installation and commercial carpet installation. Proper padding, adhesives, and tools must be ready before laying the carpet. Professionals plan placement and seam alignment carefully to avoid mistakes. Preparing in advance allows the installation to proceed quickly without interruptions. Homeowners can also ask installers about material options and padding recommendations. Preparation ensures your carpet is durable, comfortable, and installed with precision. What Happens on Installation Day On the installation day, professionals remove old carpet and padding carefully. Subfloor inspection follows to ensure no moisture, damage, or debris remains. Next, padding is installed to add comfort and protect the carpet. The carpet is then laid, stretched, and trimmed for a perfect fit. Precision ensures a smooth, wrinkle-free finish throughout the room. Residential carpet installation focuses on aesthetics and comfort, while commercial carpet installation prioritizes durability. The Carpet Man handles corners, walls, and fixtures for a seamless appearance. Following these steps ensures your carpet looks professionally installed and lasts longer without damage. Proper planning and execution are key to success. Seam and Edge Handling Seams and edges are essential for Professional carpet installation. Installers join carpet pieces to hide lines and prevent fraying. Adhesives and tools strengthen seams to withstand heavy use. Residential carpet installation emphasizes comfort and visual appeal, while commercial carpet installation ensures durability under high traffic. Properly tucking edges along walls creates a clean finish and prevents accidents. Professional carpet installation guarantees that seams are strategically placed and visually unnoticeable. Homeowners can ask about seam locations to maximize aesthetics and function. Correct seam handling enhances the carpet’s longevity, safety, and overall appearance throughout the room. Post-Installation Care After installation, final inspections are performed to ensure quality. Professionals check for wrinkles, loose edges, and alignment issues. Vacuuming removes loose fibers and debris from the installation process. Installers provide guidance on regular cleaning and maintenance for residential carpet installation. Commercial carpet installation also includes instructions to prevent wear in high-traffic areas. Following these tips extends the carpet’s life and keeps it looking new. Scheduling follow-up inspections can help detect minor adjustments early. Professional carpet installation ensures a polished finish that lasts. Homeowners gain comfort, safety, and a visually appealing carpet that meets all expectations. FAQs How long does professional carpet installation take? Professional carpet installation typically takes a few hours for small rooms and up to a full day for larger spaces. The exact time depends on the room size and preparation needed. Do I need to move furniture before installation? Yes, clearing the room of furniture and personal items helps the installers work safely and efficiently. This ensures the carpet is laid properly without obstructions. Can professional carpet installation handle residential and commercial areas? Absolutely, trained professionals can handle both residential carpet installation and commercial carpet installation. They use the right techniques for each type of space. Is padding required for professional carpet installation? Padding is highly recommended as it adds comfort, prolongs the carpet’s life, and improves insulation. It also protects the carpet from wear and tear. When can I walk on the carpet after installation? You can generally walk on the carpet immediately after installation, but avoid heavy furniture or high traffic for a few hours to let it settle properly. Schedule Your Carpet Installation Get top-notch Professional carpet installation with The Carpet Man. Reach us at 505-780-8472 or thecarpetmannm@gmail.com to book your appointment. We offer both residential carpet installation and commercial carpet installation tailored to your needs.
How to Choose the Best Carpet for Your Home
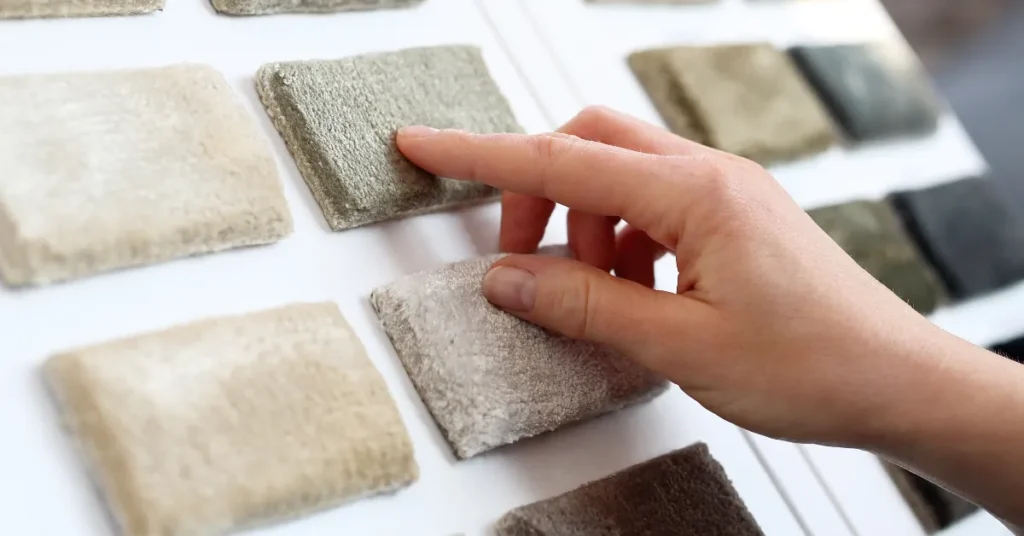
Choosing the perfect flooring can be a challenging decision for homeowners. Selecting carpet for your home is an important step to ensure comfort, durability, and style. Carpets are not only a decorative element but also provide warmth and noise reduction. When choosing carpet, consider your lifestyle, room size, and foot traffic. Families with children or pets may require carpets that are stain-resistant and durable. The color and texture of carpet can change the room’s feel, making it cozy or elegant. It is essential to evaluate different materials, pile types, and maintenance needs before making a choice. To explore our selection, visit our shop at The Carpet Man and find the perfect flooring for your home. Choosing the Right Material When selecting carpet for your home, think about material first. The Carpet Man offers guidance for choosing the right carpet. Nylon carpets are strong, affordable, and easy to clean. Wool carpets offer natural softness, insulation, and eco-friendliness. Polyester carpets are stain-resistant and vibrant in color, ideal for low-traffic areas. Consider blending materials for a balance of durability and comfort. Carpet pile height also affects appearance and feel. Low-pile carpets are better for high-traffic spaces while plush carpets add luxury to bedrooms. Texture plays a role in hiding footprints and stains. Berber carpets resist wear and look modern, while cut-pile carpets feel soft underfoot. Always match carpet type to room usage. Picking the Right Color Color selection is crucial when selecting carpet for your home. Light colors make small rooms appear larger, while dark shades hide stains. Neutral tones provide flexibility with furniture and décor, while bold colors make a statement. Consider the lighting in your room because natural and artificial lights affect carpet appearance. Patterns and designs can add elegance or hide dirt effectively. Transitional colors work well for areas that connect multiple rooms. Always get carpet samples before finalizing, as appearance may differ in real space. Matching carpet color with walls and furniture enhances overall room harmony and visual appeal. Carpet Installation Tips Carpet installation matters as much as the carpet choice itself. Professional installation ensures your carpet fits perfectly and lasts longer. Improper installation can cause wrinkles, gaps, and uneven wear over time. Padding under the carpet improves comfort and extends lifespan. Thick padding suits bedrooms, while firm padding works for living areas. Measure rooms accurately to avoid waste and extra costs. Keep in mind that wall-to-wall carpets need precise fitting, especially around corners. Proper installation techniques maintain carpet integrity and appearance. Hiring experienced installers guarantees satisfaction and reduces future repair needs for your home. Maintenance and Care Maintenance is another key factor when selecting carpet for your home. Regular vacuuming removes dust, dirt, and allergens effectively. Professional cleaning once or twice a year keeps carpet fibers healthy. Treat stains immediately using recommended carpet cleaners to avoid permanent damage. High-traffic areas may require spot cleaning more often. Furniture placement can prevent wear patterns and extend carpet life. Avoid dragging heavy items directly across the carpet. Use protective pads under chairs or tables. Proper maintenance maintains softness, appearance, and hygiene. Always follow manufacturer instructions for cleaning to protect your carpet investment over time. FAQs About Selecting Carpet for Your Home How often should I replace my carpet? Most carpets last between 8 to 12 years with regular care. Replacing on time ensures comfort and maintains home value. What is the best carpet material for pets? Nylon or polyester carpets are ideal. They resist stains and wear, making cleaning easier. How do I choose carpet color for small rooms? Light shades create the illusion of space. They also brighten rooms naturally. Should I hire a professional for carpet installation? Yes, professional installers ensure a perfect fit. They prevent wrinkles and uneven wear over time. How do I maintain the carpet to last longer? Vacuum regularly, treat stains promptly, and schedule professional cleaning once or twice a year. Budget Considerations Budget considerations affect the final carpet decision significantly. Higher quality carpets cost more upfront but last longer. Factor in material, installation, and maintenance expenses. Affordable carpets may work well for temporary areas or rentals. Long-term investment in durable carpets pays off by reducing replacement costs. Compare prices across stores and brands while checking for sales. Warranties can provide extra protection for defects and wear. Balance style, comfort, and longevity with your budget to make a practical choice. Remember that quality carpets enhance home value and everyday living experience for everyone in your household.
The Complete Guide to Residential Carpet Installation
Installing a new carpet in your home brings warmth, style, and comfort. Many homeowners often overlook how important professional installation is for longevity. Residential carpet installers ensure every inch is properly measured, fitted, and secured. Choosing the right installer impacts both appearance and durability. From selecting the right padding to handling tricky corners, experts provide precise work that avoids common DIY mistakes. For those considering a fresh look, investing in professional carpet installation saves time, money, and frustration. Learning the steps involved and understanding what to expect makes the entire carpet installation process smoother for homeowners. Understanding the Carpet Installation Process The carpet installation process starts with accurate measurement and preparation. The Carpet Man residential carpet installers first remove old flooring carefully and clean the surface. Any imperfections in the floor can affect the final result, so proper preparation is essential. Next, padding is laid to add comfort, reduce noise, and increase carpet life. The carpet is then rolled out and cut to fit each room perfectly. Stretching and tacking ensure the carpet stays secure over time. During professional carpet installation, The Carpet Man installers check seams and edges to guarantee a seamless finish. Choosing quality materials also enhances the overall appearance of your new carpet installation. Benefits of Professional Carpet Installation Professional carpet installation offers benefits beyond aesthetics. It increases comfort and can improve indoor air quality by reducing dust accumulation. Residential carpet installers know how to handle different carpet types such as plush, Berber, or patterned varieties. They also ensure the carpet lays flat without wrinkles, ripples, or bumps. A well-installed carpet lasts longer and maintains its look for years. Carpet installation services often include cleanup and disposal of old flooring materials, which can be cumbersome for homeowners. Homeowners enjoy peace of mind knowing experts manage the process efficiently, avoiding common issues found in DIY carpet installation attempts. Choosing the Right Carpet Choosing the right carpet is a critical step in the installation process. New carpet installation requires selecting a fiber type, pile height, and color that complements your home. Residential carpet installers can advise on the best materials based on durability, comfort, and maintenance needs. For high-traffic areas, durable carpets such as nylon or polyester are recommended. Padding selection also plays an essential role in overall carpet performance. Homeowners who attempt DIY carpet installation may overlook these considerations, resulting in uneven wear or reduced comfort. Seeking guidance from professional carpet installation experts ensures the right combination of materials and techniques for a lasting result. DIY Carpet Installation vs Professional Services DIY carpet installation may seem appealing for budget-conscious homeowners. However, without experience, it often leads to mistakes such as uneven cuts, ripples, or improper stretching. Residential carpet installers bring expertise and the right tools for flawless results. Even simple rooms can present challenges with doorways, corners, and transitions between rooms. Professional carpet installation services handle these issues with precision, avoiding frustration and wasted material. Understanding the carpet installation process helps homeowners appreciate the work involved. While DIY installation can work for small projects, large areas or high-end carpets are best handled by trained experts who guarantee long-term satisfaction. Maintaining Your Carpet After Installation Maintenance after installation is crucial to prolong carpet life. Regular vacuuming prevents dirt from embedding into fibers and maintains appearance. Residential carpet installers often provide care instructions specific to your carpet type. Stain removal should be immediate to prevent permanent damage. Routine professional cleaning can enhance carpet longevity and keep the home environment healthy. Choosing the right carpet installation services ensures you also receive advice for ongoing maintenance. By following expert guidance, homeowners can enjoy a comfortable, attractive, and durable carpet in their home. Proper installation combined with good care delivers the best long-term results for any household. FAQs How long does residential carpet installation take? Residential carpet installation usually takes a few hours for an average-sized room. Larger rooms or complex layouts may take longer. Can I install carpet myself? DIY carpet installation is possible but can lead to mistakes like uneven seams or wrinkles. Professional installers ensure a flawless result. What is the best type of carpet for high-traffic areas? Durable carpets like nylon or polyester are ideal for high-traffic areas. They are long-lasting, easy to clean, and maintain their appearance. Do residential carpet installers remove old carpets? Yes, professional installers typically handle old carpet removal and disposal. This saves homeowners time and effort. How should I maintain my newly installed carpet? Vacuum regularly, treat stains immediately, and schedule occasional professional cleaning. Proper maintenance extends carpet life and keeps it looking fresh. Homeowners | Schedule Your Residential Carpet Installation with The Carpet Man If you are ready to enhance your home with expert carpet installation, The Carpet Man is here to help. Our team of experienced residential carpet installers ensures precise, high-quality work for every project. Whether you need new carpet installation or professional carpet installation services, we handle every step with care and efficiency. Contact us today to schedule your appointment or get a free estimate. Reach out via email at thecarpetmannm@gmail.com or call us directly at 505-780-8472. Let The Carpet Man transform your home with beautiful, long-lasting carpets.
Custom Area Rugs | Tailored to Fit Your Unique Space

Designing a home that feels warm and inviting starts with the floor. Area rugs handmade are an essential element for creating a cozy atmosphere while adding style. Handmade area rugs offer craftsmanship that machine-made rugs cannot match. They bring personality to your living space and allow creative expression. Each rug can be tailored to your room dimensions, ensuring a perfect fit. Luxury area rugs provide elegance and long-lasting quality. Tailored floor coverings enhance furniture placement and color schemes beautifully. Unique area rugs elevate your decor instantly, combining art with function in every space. Choosing the Right Material When selecting Area rugs handmade, choosing the right material is key for durability. Wool, silk, and cotton are popular fibers for handmade rugs. Wool is soft, resilient, and naturally stain-resistant, making it ideal for high-traffic areas. Silk adds a luxurious sheen, perfect for elegance in living spaces. Cotton is flexible, easy to clean, and absorbs dye beautifully. Blended fibers combine the strengths of each material. At The Carpet Man, handmade area rugs allow customization of patterns, colors, and textures. Tailored floor coverings reflect your style and complement your décor effortlessly. Unique area rugs make every room look extraordinary and welcoming. Custom Designs and Styles Customization makes handmade rugs a great investment for homes. You can choose designs from traditional to contemporary abstract styles. Area rug design ideas are nearly limitless when working with skilled artisans. Luxury area rugs include intricate patterns, unique colors, and tailored sizes. Tailored floor coverings ensure rugs fit perfectly in any room. Handmade area rugs create warmth and texture for a cozy atmosphere. Unique area rugs can be statement pieces in living rooms, bedrooms, or hallways. Skilled craftsmanship ensures unmatched quality and attention to detail. Every rug reflects artistry, creativity, and personalization for your home. Caring for Handmade Rugs Proper care keeps Area rugs handmade looking beautiful for years. Regular vacuuming without strong attachments protects fibers effectively. Rotate rugs occasionally to ensure even wear and prevent fading. Avoid direct sunlight on delicate silk or cotton rugs. Spot cleaning with gentle solutions removes spills quickly. Professional cleaning services provide deep cleaning without harming patterns. Handmade area rugs respond well to maintenance, keeping colors bright. Tailored floor coverings stay functional and comfortable for long-term use. Unique area rugs retain beauty when properly maintained and cared for consistently. Enhancing Interior Design Incorporating custom area rugs improves both aesthetics and function in spaces. Handmade area rugs reduce noise and improve insulation. Luxury area rugs add warmth and anchor furniture effectively. Tailored floor coverings can define zones in open layouts. Area rug design ideas include layering textures and experimenting with colors. Unique area rugs complement walls, drapes, and furniture elegantly. Handmade craftsmanship ensures each rug is one-of-a-kind. Area rugs handmade are timeless additions that adapt to changing décor trends. Custom rugs elevate home style subtly while providing comfort and sophistication. Perfect Rug Sizing Choosing the right rug size ensures balance and proportion. Measure your room carefully and account for furniture placement. Handmade area rugs allow flexibility to fit any space. Luxury area rugs look proportional under sofas or dining tables. Tailored floor coverings prevent overcrowding or empty areas visually. Area rug design ideas often focus on symmetry, contrast, or bold statement pieces. Unique area rugs create cohesion in interior themes. Investing in Area rugs handmade ensures homes feel curated and personalized. Custom rugs enhance comfort and visual appeal for every setting efficiently. Value of Handmade Rugs Investing in Area rugs handmade adds elegance and value to homes. They provide warmth, personalization, and style that standard rugs cannot. Handmade rugs are crafted with skill, care, and artistry. Luxury area rugs combine durability, beauty, and design. Tailored floor coverings fit your space perfectly and complement décor. Unique area rugs act as eye-catching focal points. Area rug design ideas offer endless possibilities, from minimal to bold patterns. Choosing handmade rugs supports craftsmanship and creates timeless interiors everyone enjoys. Custom area rugs provide both beauty and functional excellence. FAQs What are the most durable materials for handmade custom rugs? Wool, silk, and cotton are the most durable materials. They resist wear and maintain their quality for many years. How do I clean a handmade area rug safely? Vacuum gently and avoid harsh brushes. Professional cleaning ensures deep dirt removal without damage. Can I customize the size and design of a handmade rug? Yes, skilled artisans can create rugs in your preferred size, pattern, and color combination. Are luxury area rugs suitable for high-traffic areas? Yes, especially wool rugs. They are resilient, stain-resistant, and handle heavy foot traffic well. How often should I rotate my custom area rug? Rotate your rug every few months. This prevents uneven wear and keeps colors vibrant. Customize Your Area Rugs with The Carpet Man If you want a rug that perfectly fits your space, The Carpet Man can help. Our team specializes in creating Area rugs handmade tailored to your size, design, and color preferences. Whether you need a traditional pattern or a modern look, we craft unique rugs that enhance your home’s style. Contact us today at 505-780-8472 or email thecarpetmannm@gmail.com to start designing your custom area rug and bring your vision to life.
Office Flooring Trends in Downtown Santa Fe | Why Tiles Are a Smart Choice

In Downtown Santa Fe, businesses are increasingly choosing office floor tiles to enhance their workspaces. These tiles offer durability, easy maintenance, and a professional appearance that appeals to employees and clients alike. Unlike carpet or hardwood, tile flooring withstands heavy foot traffic and spills without showing wear quickly. Modern offices also appreciate the variety of colors, patterns, and textures available, making the office floor tiles design an important factor in creating a stylish and functional space. Whether for small startups or large corporations, office floor tiles create a clean and welcoming environment. Choosing the right tiles can improve productivity, comfort, and overall office aesthetics. Investing in quality flooring is a smart long-term choice for any business in Santa Fe. Benefits of Installing Tiles in Offices Installing tiles in office spaces provides both practical and aesthetic benefits. Tiles are resistant to scratches, stains, and moisture, which are common in busy workplaces. Many businesses choose tile office floor solutions to reduce maintenance costs while ensuring a polished look. Properly installed tiles can brighten interiors and make spaces feel larger. They are compatible with radiant heating systems, which is ideal for colder months. Offices with high foot traffic benefit from the durability of tiles, as they do not fade or warp like other flooring options. Additionally, tiles offer flexibility for future office redesigns, allowing layouts to be easily adapted. Selecting the Right Office Flooring Tiles Choosing the right office flooring tiles involves evaluating material, finish, and style. Ceramic, porcelain, and natural stone tiles are the most common choices. Porcelain is particularly valued for its water resistance and longevity. In addition to durability, the office floor tiles design can define work zones or visually enhance open-plan layouts. Lighter colors improve natural light reflection, creating brighter workspaces. Neutral tones are popular as they suit most office furniture and branding. Businesses also consider tile size, finish, and texture for safety and comfort. A well-selected tile ensures years of professional appearance and ease of maintenance, making the investment worthwhile. Current Design Trends in Downtown Santa Fe Offices Modern design trends focus on simplicity, elegance, and functionality. Many offices now favor subtle patterns and neutral shades to create a professional ambiance. Some designers use office flooring tiles to introduce geometric shapes or accent walls in common areas. Mixing textures can prevent slipping in high-traffic zones while maintaining style. Eco-friendly tile options are also becoming popular for sustainable office renovations. Combining tile office floor choices with furniture and lighting enhances overall aesthetics. These trends not only improve office appearance but also support productivity and comfort. Downtown Santa Fe offices adopting these styles show a commitment to modern, practical workspace design. Maintenance and Longevity of Office Tiles Office floor tiles require minimal upkeep compared to other flooring types. Dirt, spills, and stains can be cleaned easily with standard products. Tiles resist scratches and fading, making them ideal for busy office environments. Slip-resistant finishes increase workplace safety, especially in entryways and corridors. Another advantage is that damaged tiles can be replaced individually without affecting the rest of the floor. This makes renovations and repairs less disruptive. Combining tiles with rugs in seating areas can improve comfort while maintaining a professional appearance. Overall, investing in durable office floor tiles ensures long-term value and cleanliness for office spaces. Boosting Property Value and Professional Appeal High-quality office floor tiles enhance both the appearance and market value of commercial properties. They signal professionalism to clients and create a welcoming environment for employees. Customizable tile colors and patterns allow businesses to reflect branding subtly in the office. Installing tiles in lobbies, conference rooms, and common areas improves visual appeal and functionality. Renovations featuring office floor tiles offer flexibility for future expansions or layout changes. Well-chosen tiles are a cost-effective investment, combining style, durability, and practical maintenance benefits. In Downtown Santa Fe, companies increasingly recognize the long-term advantages of professional tile installations. Conclusion | Why Tiles Are a Smart Choice Downtown Santa Fe offices are embracing office floor tiles for their durability, style, and low maintenance. The right selection of office flooring tiles enhances comfort, productivity, and professional image. Modern trends prioritize subtle designs and practical textures that blend safety and aesthetics. High-quality tile office floor installations provide long-lasting performance while boosting property value. By combining visual appeal with functionality, offices can create spaces that impress clients and support employees. Choosing durable, stylish office floor tiles is a smart solution for any business seeking a practical, professional, and attractive workspace. FAQs What types of office floor tiles are best for Downtown Santa Fe? Ceramic, porcelain, and natural stone tiles are ideal for durability, moisture resistance, and style. How often should office floor tiles be cleaned? High-traffic office tiles should be cleaned daily, with deep cleaning monthly for longevity. Can tile office floor designs improve workplace productivity? Yes, lighter colors and simple patterns reflect light and enhance focus and comfort. Are office flooring tiles suitable for conference rooms? Absolutely. They are durable, easy to maintain, and create a professional impression. Can damaged office floor tiles be replaced individually? Yes, individual tiles can be replaced without affecting the surrounding flooring or layout. Contact The Carpet Man for Expert Office Floor Tile Services For businesses in Downtown Santa Fe looking to upgrade their workspaces with durable and stylish office floor tiles,The Carpet Man is your trusted partner. Our team provides expert installation, maintenance, and design advice to ensure your office looks professional and welcoming. Get in touch today to discuss your project and receive a free consultation. Call us at 505-780-8472 or email thecarpetmannm@gmail.com to schedule your service and transform your office with high-quality tile flooring solutions.
14 Kitchen Backsplash Tile Ideas to Pair With Wood Cabinets
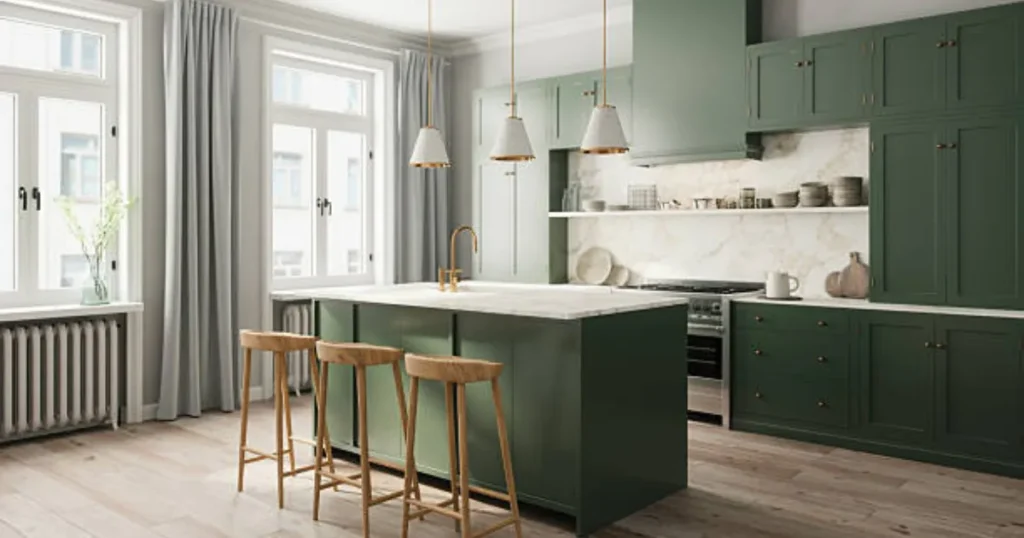
When designing a kitchen, choosing the right backsplash can transform the entire space. Many homeowners struggle to find kitchen backsplash ideas that match their wood cabinets perfectly. A kitchen backsplash is more than just a decorative wall; it protects surfaces from spills, stains, and water damage while adding style. Whether you have light oak or dark walnut cabinets, the right backsplash can make your kitchen feel modern and inviting. Homeowners often search for tile backsplash ideas that balance function and aesthetics. At The Carpet Man Santa Fe, we understand how selecting tiles with the correct color, texture, and pattern enhances the kitchen’s personality and complements wood cabinets naturally. Subway Tile Backsplash Ideas One popular choice is a subway tile backsplash. White or cream subway tiles work beautifully with darker wood cabinets, creating a timeless and clean look. For lighter cabinets, a gray or soft pastel subway tile adds subtle contrast without overwhelming the space. Subway tiles are affordable, easy to install, and versatile, making them perfect for homeowners who prefer a classic aesthetic. Pairing these tiles with stainless steel appliances creates a modern, bright environment. Additionally, adding a glossy finish helps reflect light and makes the kitchen feel larger. Many designers recommend this option because it combines elegance and practicality effortlessly. Mosaic Tile Backsplash Ideas Mosaic tile backsplashes are an exciting way to add texture and color. Small glass or stone tiles can create unique patterns and focal points behind the stove or sink area. These tiles come in endless color combinations, allowing homeowners to match wood cabinets while introducing vibrancy. A mix of neutral shades with metallic accents works well with medium-tone wood cabinets. Mosaic tiles also provide a more artistic feel, making the kitchen stand out. They are durable, easy to clean, and resistant to stains. Many homeowners love mosaic designs because they provide both style and protection, turning a practical surface into a work of art. Geometric Tile Backsplash Ideas For a more modern approach, consider a geometric tile backsplash. Triangles, hexagons, and other shapes create visual interest in minimalist kitchens. Geometric patterns pair well with simple wood cabinets by breaking monotony and adding personality. Dark wood cabinets combined with lighter geometric tiles make the kitchen feel balanced and stylish. These tiles can be ceramic, porcelain, or glass, providing multiple texture options. Geometric designs also allow flexibility in color schemes, enhancing creativity without clashing with cabinet finishes. Designers often use these patterns to draw attention to specific areas, such as the cooking zone or breakfast bar. This approach works well in contemporary and transitional kitchens alike. Textured Tile Backsplash Ideas Textured tiles are another great choice for pairing with wood cabinets. 3D tiles or stone-like finishes bring depth and tactile interest to kitchen walls. Lighter cabinets often pair well with textured neutral tiles, creating a cozy and natural vibe. Textured backsplashes also help hide minor stains or splashes from daily cooking. Stone-look tiles can mimic marble or travertine, adding a luxurious feel without high costs. They are durable, water-resistant, and visually striking. Homeowners often combine these tiles with wooden shelves or accents to enhance warmth. Using textured tiles behind sinks or stoves ensures practicality while maintaining elegance in everyday kitchen design. Metallic Tile Backsplash Ideas Metallic tile backsplashes give kitchens a contemporary and glamorous feel. Copper, gold, or brushed nickel tiles complement medium or dark wood cabinets beautifully. Metallic finishes reflect light and create a sense of sophistication. These tiles pair well with neutral countertops to prevent overpowering the space. Small metallic tiles can be used as accents, or larger panels cover entire walls for dramatic effect. They are easy to clean and maintain, resisting water and heat. Many designers recommend metallic backsplashes for modern kitchens with a touch of luxury. Using metallic tiles also adds dimension and contrast to wooden cabinet tones naturally. Glass Tile Backsplash Ideas Glass tile backsplashes offer a sleek and modern alternative. Transparent or frosted glass tiles enhance light reflection and make kitchens appear spacious. These tiles work exceptionally well with darker wood cabinets by providing bright contrast. Glass backsplashes are easy to clean, resistant to stains, and perfect for a contemporary look. They are available in multiple colors and shapes, allowing creative designs behind sinks or stoves. Combining glass tiles with wood cabinetry gives a sophisticated, high-end feel without appearing overly flashy. Many homeowners prefer glass because it is versatile, durable, and stylish while pairing naturally with different cabinet finishes. Natural Stone Tile Backsplash Ideas Another timeless option is natural stone tile backsplashes. Granite, marble, and slate tiles provide organic beauty and elegance. These tiles pair well with almost any wood cabinet color, creating harmony in the kitchen. Stone backsplashes are heat-resistant, durable, and easy to maintain with proper sealing. They offer a luxurious look without requiring complex installation. Designers often recommend contrasting light stone with dark cabinets or warm stone tones with lighter wood. This approach brings a natural feel and depth to the kitchen environment. Stone tiles also complement countertops, creating a cohesive and balanced design effortlessly. Patterned Tile Backsplash Ideas Patterned tiles, like Moroccan or encaustic designs, add character to kitchens. These tiles work well as accent walls behind stoves or islands. Neutral wood cabinets allow patterned tiles to become the focal point without clashing. Colorful and bold designs create vibrancy, while softer patterns offer subtle charm. Patterned tiles are versatile and can suit traditional, bohemian, or eclectic kitchens. Homeowners often mix patterns with solid tiles for balance. Using patterned tile backsplashes adds personality while protecting walls from spills. They also encourage creativity in kitchen design and make cooking areas visually appealing. Brick-Style Tile Backsplash Ideas Brick-style or rustic tile backsplashes evoke warmth and charm in kitchens. Red or white brick tiles pair beautifully with oak or walnut cabinets. These tiles create a cozy, farmhouse-inspired look without complex maintenance. Brick-style tiles are durable, easy to clean, and perfect for creating a textured appearance. They combine well with wood and metal accents for balanced aesthetics. Homeowners often use