Installing a tile backsplash can completely change the look of your kitchen or bathroom. If you want a fresh and professional finish, knowing the right techniques is essential. Many homeowners try to save money by doing it themselves, but the results often depend on planning, tools, and correct procedures. Choosing the right materials is just as important as preparation. Today, we will guide you step by step on installing a tile backsplash for both kitchens and bathrooms. By following this guide, you can achieve a professional look and avoid common mistakes. Proper installation ensures durability, style, and a clean, polished appearance.
Choosing the Right Tiles for Your Backsplash
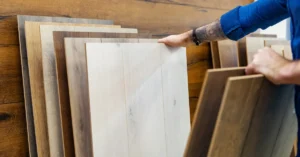
The first step in installing a tile backsplash is to select the right tiles. Ceramic tile backsplash remains the most popular option for its affordability and versatility. Stone backsplash tile is ideal for more elegant and modern designs, offering texture and durability. Make sure to measure your wall space accurately to know how many tiles you will need. Planning is crucial to avoid running short of materials midway. You should also gather tools like tile adhesive, spacers, a level, and a notched trowel. Once prepared, you can begin laying tiles in your desired pattern for the best visual appeal.
Preparing the Wall Surface
Before placing tiles, prepare the wall surface thoroughly. Clean the wall with a mild detergent to remove grease, dust, or residue. Smooth out any bumps and patch any holes for a flat surface. If your wall is uneven, consider using a backer board for a sturdy base. Mark the center of the wall with a level to ensure your tiles remain straight. Proper preparation saves time and prevents future problems like tiles falling or adhesive failing. Once ready, mix the tile adhesive according to package instructions. Spread the adhesive evenly with a notched trowel for consistent coverage and adhesion.
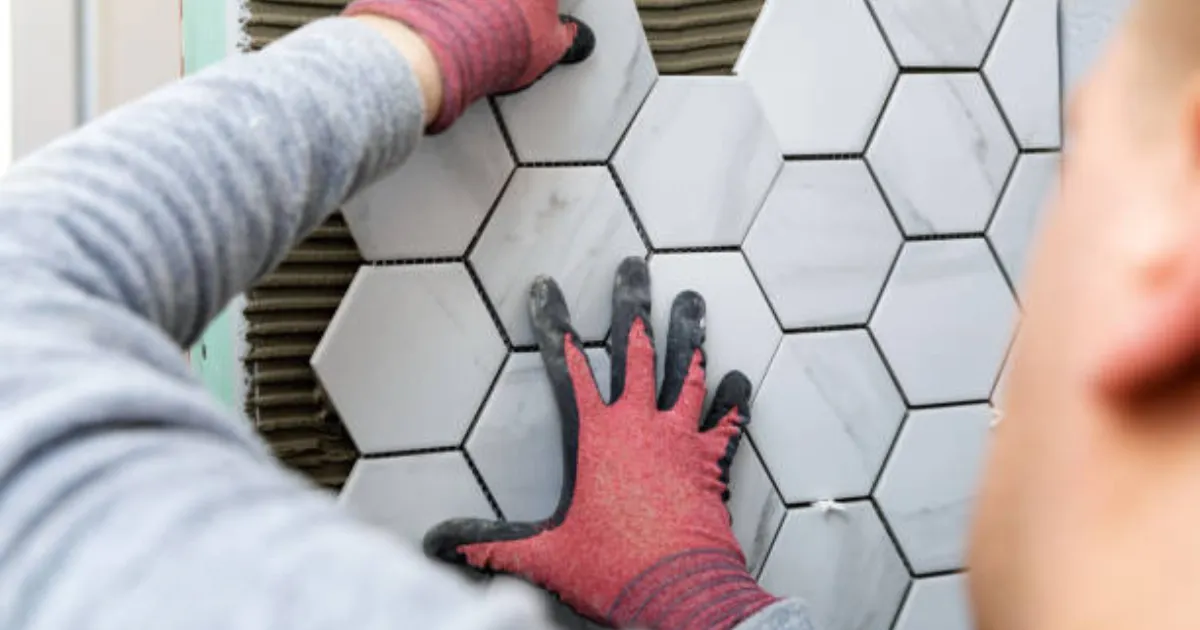
Laying Tiles Like a Professional
When installing a tile backsplash, start at the center line and work outward. This technique ensures symmetry and prevents awkward cuts at corners. Use tile spacers between tiles to maintain even gaps for grout. Check the alignment frequently using a level to avoid uneven placement. Adjust tiles immediately if they appear misaligned to save future corrections. Cutting tiles is sometimes necessary around outlets or edges. A tile cutter or wet saw will make precise cuts for a professional finish. Patience during this step guarantees a clean, organized look once your backsplash is completed and dry.
Grouting and Finishing Your Backsplash
After placing all tiles, let the adhesive cure for the recommended time. Usually, 24 hours is sufficient for tiles to stick firmly. Next, remove tile spacers carefully to avoid disturbing the layout. Prepare the grout by mixing it to a smooth consistency without lumps. Apply grout with a rubber float, pressing it into spaces between tiles. Wipe off excess grout with a damp sponge before it dries completely. Let the grout cure according to instructions, usually about 48 hours. Once cured, clean the surface of the tiles for a polished appearance. Sealing the grout ensures durability and prevents stains over time.
Tips for Kitchen and Bathroom Backsplash Installation
Kitchen tile backsplash installation can greatly improve your cooking space aesthetics. Choose tiles that complement your cabinetry and countertops for a cohesive design. Popular patterns include subway, herringbone, or mosaic designs for variety. For bathroom tile backsplash installation, consider water-resistant tiles and grout. Stone backsplash tile adds sophistication, while ceramic tiles offer easy maintenance. Always measure and plan layouts to minimize cuts and wasted material. Installing a tile backsplash might seem challenging, but careful preparation, patience, and proper tools make it manageable. Even beginners can achieve professional results with clear guidance and attention to detail.
Frequently Asked Questions
Can I install a tile backsplash myself?
Yes, with the right tools, preparation, and patience, anyone can install a backsplash.
What is the easiest tile for beginners?
Ceramic tiles are the simplest and most forgiving for new DIY installers.
How long does a tile backsplash last?
A properly installed backsplash lasts for decades without damage or discoloration.
Do I need to seal my grout?
Yes, sealing grout prevents stains, water damage, and makes cleaning easier.
Can stone tiles be used in bathrooms?
Absolutely, stone tiles provide elegance but ensure proper sealing to prevent moisture issues.
Creative Tile Backsplash Ideas
Tile backsplash ideas are limitless, from colorful mosaics to simple, classic designs. Consider mixing materials for a unique appearance that stands out. Lighter tiles make small spaces feel larger, while darker tiles offer contrast. Remember to maintain proper spacing for grout lines to keep a neat appearance. Proper cleaning during installation prevents stains or adhesive residue from sticking. Choosing the right tools, adhesives, and tiles guarantees lasting quality. Regular maintenance afterward ensures your backsplash remains pristine for years. With practice, installing a tile backsplash can be enjoyable and rewarding. Homeowners gain pride seeing their wall completely transformed.
Call us today at (505) 780-8472 or click here to schedule your backsplash installation service now.