
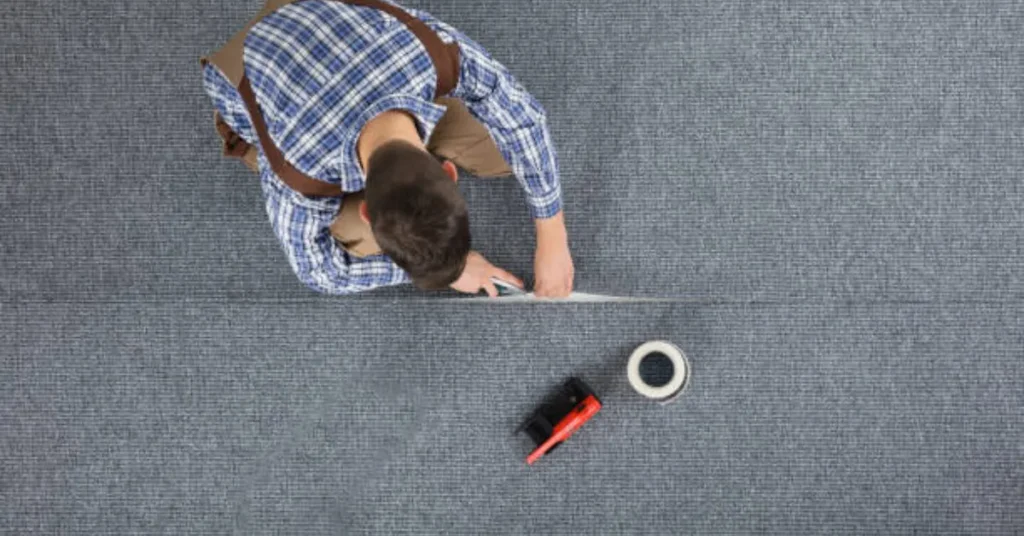
Choosing the Right Commercial Carpet Installers for Your Business
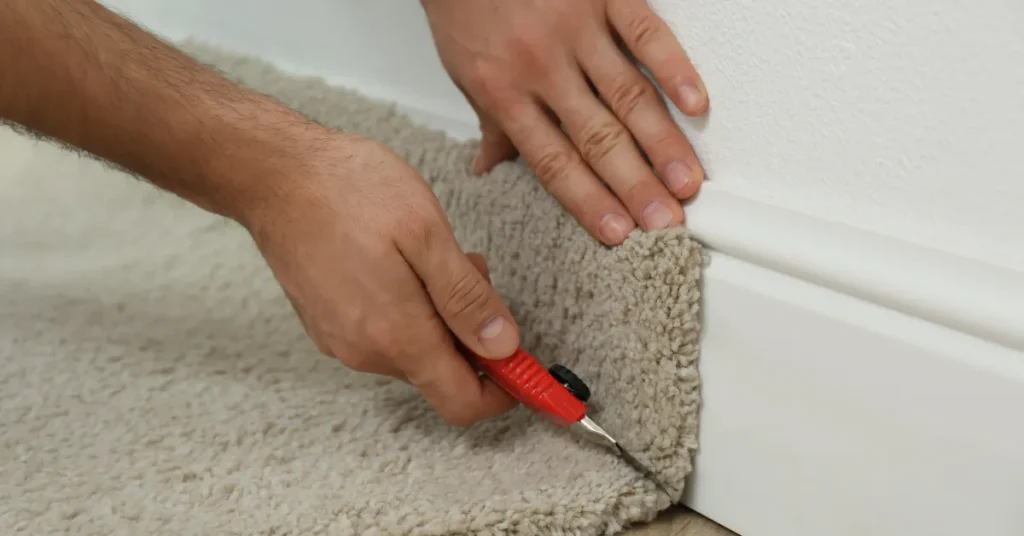
Finding the right carpet installers is very important for businesses today. If you want a smooth and lasting floor, knowing how to install carpet correctly matters. The flooring in a workspace affects the look and comfort of the whole area. A good installation makes the place more appealing for clients and employees alike. Many people look for experts who can handle different types of carpets. In offices and commercial spaces, the work must be both fast and accurate. Mistakes during installation can lead to extra costs and wasted time. Professional teams understand how to prepare surfaces for better results. If you are learning how to install carpet for your space, knowing the right process helps. It also ensures you select the right installers for long lasting performance. Understanding the Carpet Installation Process The first step is understanding what carpet installation really involves for your space. This process starts with checking the floor condition before any new work begins. Some people ask can you install carpet over tile and it depends on the case. In many situations the tile must be smooth, clean, and level first. Installers will then measure the area carefully to avoid material waste. The carpet is cut according to the layout of the room or office. Adhesive or tack strips are then used to secure the material in place. Each installer has a method to make sure the seams are not visible. This attention to detail ensures a neat and professional finish every time. Choosing the Right Commercial Carpet Installation Team When hiring for commercial carpet installation, you should look at their experience. Ask if they have worked on similar business spaces like yours before. This gives you a better idea of the quality you can expect. If you want to understand how to install carpet properly, experienced installers will explain the best methods. You might wonder do you tip a carpet installer after the work is done. In the USA, tipping is not required but is a nice gesture for great service. More important is to check the warranty they offer for their work. Reliable installers give guarantees because they are confident in their skills. Some also offer carpet binding services for custom edge finishing. These extra services can make your carpet last longer and look more polished. How Long Does Carpet Installation Take It is also important to know how long does carpet installation take for your project. The time needed depends on the size and design of the space. Small office areas can be completed in a few hours if well prepared. Larger commercial floors may take a full day or more to finish. If your space needs both removal and new installation, add more time to the plan. Many professional companies offering Carpet Replacement Services will explain the timeline before they start the work. This allows you to plan business operations without too much disruption. Always confirm that the team will clean up after finishing the job. A clean workspace after installation shows professionalism and respect for your property. Residential Carpet Installation vs Commercial Carpet Installation For residential carpet installation, the process is slightly different from commercial jobs. Home spaces often need more detailed work in corners and smaller rooms. There is also more focus on comfort and style rather than heavy traffic wear. In both cases, how to install carpet correctly matters for long term use. The right underlay or padding will add comfort and extend carpet life. Good installers will also help you choose the best material for your needs. For homes, softer textures may be better, while for offices durable fibers work best. Asking about maintenance tips can also help you keep the carpet looking fresh. Proper care from the start means you avoid costly replacements in the future. Important Questions to Ask Your Installer Before choosing your installer, always ask for references from past clients. This helps you see the quality of their carpet installation in real situations. Look for reviews online and check if the company is licensed and insured. These steps protect you in case something goes wrong during the job. A good team will communicate clearly about costs, materials, and timelines. They will also guide you on how to install carpet properly and whether can you install carpet over tile in your case. Clear answers show they understand the job and can meet your needs. Being informed before hiring avoids stress and ensures a smooth installation process. Final Inspection and Aftercare Tips After the job is complete, there are small things to check before payment. Look at the seams and make sure they are flat and even in color. Check that the carpet edges are secure and not lifting at the corners. Walk over the whole space to ensure the surface feels even and firm. If you had special carpet binding services done, inspect the edges closely. A professional team will fix any issues right away without extra cost. This is part of the service you should expect when paying for quality work. Keeping a record of your warranty and service details is also wise. It helps in case you need repairs or maintenance in the future. Conclusion In the end, knowing how to install carpet is useful even if you hire pros. It helps you understand the steps and what to expect during the work. For businesses, the right commercial carpet installation improves both look and function. For homes, residential carpet installation adds warmth and comfort to daily life. Choosing the right team is about more than just price. Look for skill, experience, and a willingness to guide you through the process. Whether you need a quick job or a large project, planning is key. With the right installers, you get a result that is both beautiful and durable.
How Professional Laminate Floor Installation Enhances Your Space
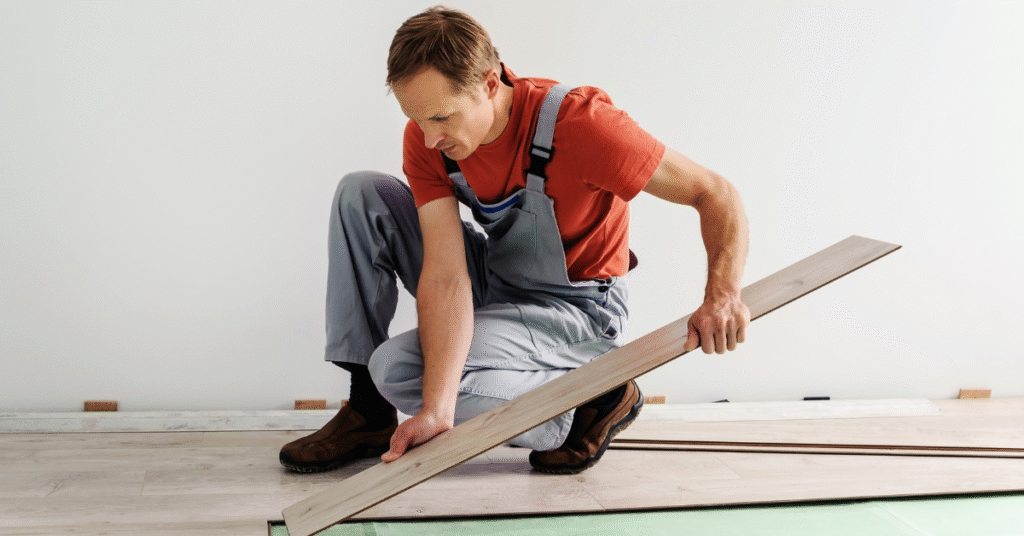
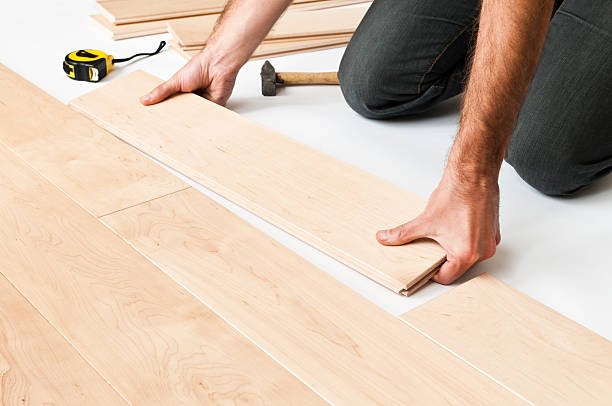
Many homeowners now prefer laminate flooring for its style and value. Homeowners love it for its affordability, durability, and stylish appearance. Whether you’re remodeling your home or updating your office, this flooring can do wonders. But many people ask: can you install laminate flooring over tile? This is a valid question when you’re trying to upgrade your space without removing existing tile floors. The answer is yes, in many cases, you can. However, doing it properly is the key. That’s why hiring a professional laminate flooring installer makes a big difference. They ensure the job is done right, saving you time and future repair costs. With expert installation, your floors look better and last much longer. Preparing Your Tile for Laminate Flooring A professional knows how to check for flatness and subfloor issues. They also understand if your tile is in good condition for installing laminate. The process includes placing underlayment to reduce moisture and noise. Can laminate flooring be safely installed on top of tile? Absolutely yes, with the right steps and materials. A professional avoids air pockets or uneven spots, making your floor feel stable. This enhances your space both in looks and performance. Whether it’s for a home or business, choosing an expert ensures a clean finish. Commercial laminate is built to handle heavy use in active environments. It gives a fresh look while being tough on wear and tear. Carpet, Vinyl, or Laminate? Making the Right Switch You can enjoy the beauty of wood or stone with laminate, minus the hassle. When you hire a laminate flooring installer, they help you select the right design. They can also explain why laminate is better than other options in some cases. Many people switch from carpet because laminate is easier to clean. Also, if you’re wondering, can you install laminate flooring over carpet? The answer is no, it’s not recommended. Carpet is too soft and unstable, which can damage your new laminate. It’s best to remove carpet first, then proceed with the new flooring. Whether you’re switching from carpet installation or considering vinyl installation, laminate is often more durable. Laminate vs. Tile | Which Is Easier to Install? Compared to tile floor installation, laminate takes less time and effort. It also has fewer messy materials involved. Tiles need grout and adhesives, which can be time-consuming. Laminate is installed with a click-lock system, making it quicker and cleaner. Still, a DIY job may leave you with uneven edges or gaps. That’s where professional help comes in. They ensure every plank is aligned perfectly for a seamless finish. So again, when people ask, can you install laminate flooring over tile, For many homes, the answer is a confident yes.Experts also make sure that moisture barriers are used where needed, especially in kitchens or basements. Hardwood Alternative with Added Benefits If you’re considering hardwood floor installation, laminate can be a cost-saving alternative. Hardwood looks great, but it’s expensive and requires more upkeep. Laminate gives a similar look with less maintenance. A professional installer can show you side-by-side samples and help you choose. They also work faster than average DIYers, minimizing disruption in your home. With the right tools, they cut planks accurately and avoid damage. If you’ve ever asked, can you install laminate flooring over tile, it’s best to let a pro inspect your floors first. They’ll guide you on whether it’s possible and what needs to be done first. Commercial Spaces Need Commercial-Grade Laminate In commercial spaces, floors get more wear and tear than homes. Commercial laminate is built for heavy traffic. It’s also great for offices, stores, or restaurants. Professionals understand the differences in grade, thickness, and water resistance. This makes your investment last longer and look better. Don’t risk mistakes trying to install it yourself. If you’re still wondering, can you install laminate flooring over tile, remember that commercial tiles can sometimes be uneven. Only a trained installer can assess the condition and recommend the right steps. Getting help saves you stress and ensures long-lasting results. Workmanship, Warranties, and Comfort A good laminate flooring installer also offers warranties on their work. It gives you confidence in the results and helps maintain your home’s value. Professionals use top-quality tools and materials to deliver flawless work. Your rooms will instantly feel brighter and more modern. Laminate also adds warmth to cold tile floors, especially during winter. That’s another reason people ask, can you install laminate flooring over tile? Yes, and it can make your space more comfortable and better insulated. From bedrooms to living rooms and even kitchens, laminate works in every room. Just make sure it’s done by someone who knows the job inside and out. Final Thoughts on Laminate Flooring In conclusion, laminate flooring enhances your space in many great ways. It’s cost-effective, stylish, and low-maintenance. Hiring a professional laminate flooring installer ensures a perfect fit and long-term durability. It’s faster, cleaner, and more reliable than doing it yourself. And to answer the common question again, can you install laminate flooring over tile? Yes, but it must be installed properly. Avoid unnecessary risks when it comes to your home or business. Trust the experts to deliver stunning, durable results that last for years. For expert service you can rely on, contact THE CARPET MAN today. Enhance your space the smart way: professionally and beautifully.
Top Signs It’s Time for Carpet Replacement
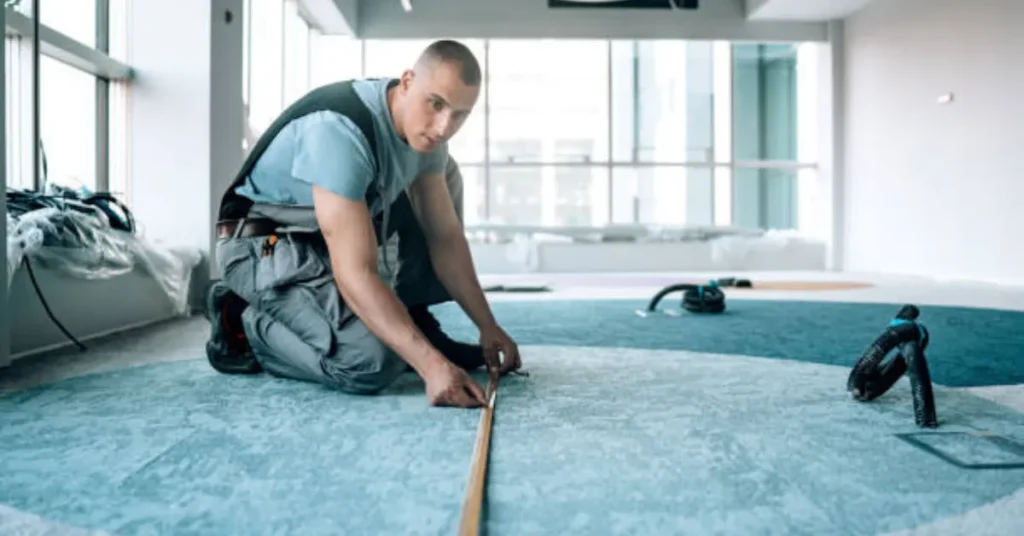
Your carpet plays a bigger role than simply covering the floor. It affects comfort, air quality, and home value. Over time, carpet begins to show wear that cleaning cannot fix. This is when many homeowners ask, how to replace carpet? Understanding the right time to make this decision is important. Whether it’s for comfort, appearance, or safety, replacing your carpet at the right time helps protect your home investment. In this blog, we’ll walk you through the top signs it’s time to replace your carpet. We’ll also talk about how to replace carpet and what you should expect during the process. Knowing the right signs saves money and stress. Let’s dive into the most common signs that call for carpet replacement services. Stubborn Stains That Never Go Away One of the biggest signs you need new carpet is permanent stains. Some spills like wine, pet accidents, and ink are tough to remove. If deep cleaning no longer helps, it might be time to replace it. Knowing how to replace carpet in stained rooms makes a big difference. Some stains can hold bacteria and bad smells. This matters even more in homes with children or pets. Choosing carpet replacement services can save more money than frequent cleanings. You might also consider replacing carpet with laminate for better stain resistance. If you often ask how often should carpet be replaced, the answer depends on your use. Stained carpet is a clear sign your floor needs a fresh start. Lingering Odors Even After Cleaning Odors that don’t go away are another clear sign it’s time. Even after deep cleaning, odors from pets, spills, or moisture can linger. These smells can affect indoor air quality and your comfort at home. If you’re wondering how to replace carpet that smells bad, act quickly. Mold or mildew could be hiding underneath. This can harm health over time. Carpet replacement services remove both the carpet and its source of odor. Sometimes, replacing carpet with laminate flooring helps reduce moisture risks. It’s also easier to clean and maintain. Odor problems won’t just go away with sprays or cleaners. If your nose notices something off, it’s time to take action. Increased Allergies in the Home Allergies that seem to get worse might also mean your carpet is the problem. Old carpet traps dust, pollen, and pet dander that vacuuming won’t remove. Even if you clean often, particles stay deep in the fibers. If your family has more allergy symptoms at home, consider how to replace carpet properly. Sisal installation may be a healthier option, as sisal is hypoallergenic and natural. Knowing how often should carpet be replaced depends on your health needs. Allergies affect daily life, so fresh carpet or new flooring can make a big difference. Don’t ignore this sign if you value a clean and healthy space. Carpet Age and Lifespan Age alone can be a sign your carpet needs to go. The average carpet has a lifespan of about 8 to 10 years. If it’s older, even if it looks okay, the padding underneath may be worn out. This affects comfort, sound insulation, and overall support. Replacing carpet with laminate is a smart choice for long-term use. It lasts longer and handles heavy use better. If you’re unsure how to replace carpet that is old, contact experts in carpet installation. They can inspect your floors and offer the best solution. Don’t wait until damage is visible. Old carpet lowers property value and comfort over time. Water Damage or Mold Issues Water damage is a key reason to replace your carpet quickly. Floods, leaks, or spills can soak deep into the padding. This leads to mold and mildew growth. Even after drying, hidden damage can stay. If you’re asking how to replace carpet that got wet, it’s best to remove everything down to the subfloor. Carpet replacement services will make sure all damage is handled. For flood-prone areas, replacing carpet with laminate or waterproof flooring is smarter. Laminate resists water better and is easy to clean. Water damage spreads quickly, so don’t delay your decision. Quick action can save your home from bigger repairs later. Home Renovation or Property Sale Finally, if you’re preparing for a home upgrade or sale, new carpet can instantly enhance your space’s appearance and comfort Buyers love clean and updated flooring. If you’re selling, think about how to replace carpet before listing your home. It’s a small step that gives great return. Commercial carpet installation also helps businesses attract more clients. Choose the right style and material for lasting value. You can also ask about sisal installation for a trendy and eco-friendly upgrade. New flooring isn’t just about looks, it shows care for your space. Final Thoughts In conclusion, carpet does not last forever. When stains, smells, allergies, or damage show up, it’s time to think about replacement. Understanding how to replace carpet can save you time and make your home more comfortable. Don’t wait until issues grow worse. Whether you’re doing it yourself or hiring pros, take the step now. Carpet replacement services like those offered by THE CARPET MAN provide many options such as sisal installation and replacing carpet with laminate. Consider your health, lifestyle, and design goals before choosing. With the right help and knowledge from THE CARPET MAN, you can enjoy a cleaner, safer, and more beautiful home.
The Complete Process of Tile Shower Installation in Santa Fe
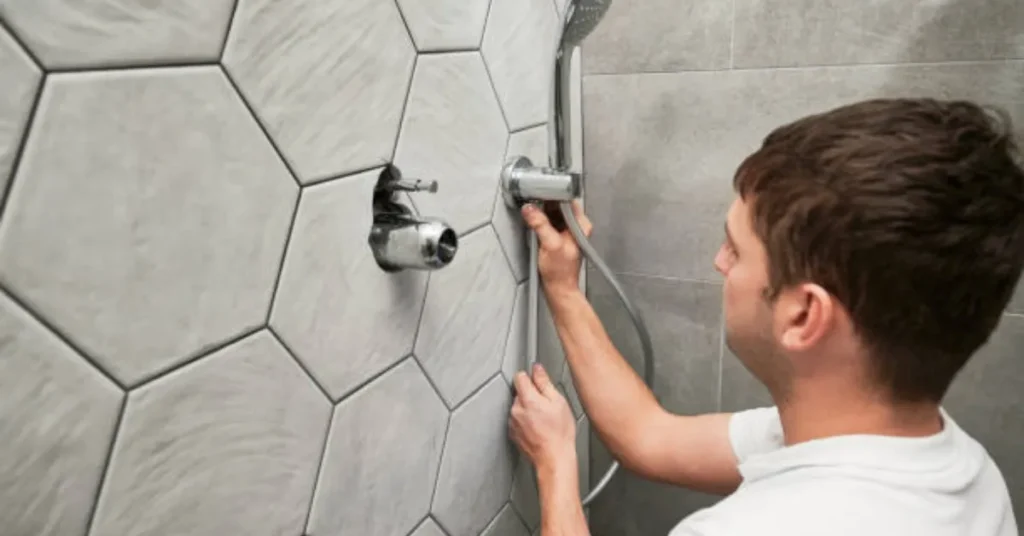
Planning a new bathroom? One of the best upgrades is a tiled shower. If you’re wondering how to install tile shower, you’ve come to the right place. We help homeowners in Santa Fe create stylish, durable spaces with expert tile shower installation. A tiled shower not only adds style to your bathroom but also boosts home value. Many homeowners choose this upgrade for its clean look and long life. Whether you’re interested in vinyl, tile, or wood surfaces, understanding the process is key. From layout to finish, every step matters for a long-lasting result. Tools and Prep Work Before Installation Before learning how to install tile shower, it’s important to prepare your workspace. Start by gathering tools like cement board, screws, notched trowel, tile cutter, thin-set mortar, spacers, and grout. Also, pick a tile that suits your bathroom’s style. Cut the cement board to fit your wall space, then screw it tightly into place. Leave a narrow gap between each board and seal the joints with mesh tape. This ensures a firm, even surface for setting your tiles. Many homeowners also prepare nearby flooring, sometimes combining tile with vinyl installation or hardwood floor installation for a seamless look throughout. Waterproofing Is the Most Crucial Step The next step in learning how to install tile shower is waterproofing. Apply a waterproof membrane over all cement board surfaces. This blocks moisture from reaching the wall structure and forming mold. Use a roller or brush to apply evenly, paying attention to corners and seams. Let the surface dry fully before installing tiles. If you skip this step, you might end up with leaks or mold. Whether your shower is in a guest bath or master suite, waterproofing ensures durability. We always stress waterproofing as part of every job, just like we do with subfloors in hardwood floor installation projects. Installing the Tile with Thin-Set Mortar Once the shower area is dry, it’s time to lay your tiles. This is the core of how to install tile shower correctly. Place your first tile in the center of the bottom row, then work side to side. Apply thin-set mortar with a notched trowel and place each tile firmly. Use spacers to keep grout lines even. Cut tiles at the edges with a tile cutter and wear safety gloves. Keep checking for level rows to avoid uneven lines. This method gives your shower a clean and professional finish. Some homeowners also pair shower tile with matching accents in vinyl installation near vanities or tubs. Grouting and Sealing the Tile Work Wait a full day so the tiles can dry before you start grouting. Stir the grout until it’s smooth, then spread it with a rubber float. Push it into the spaces between tiles and wipe off what’s left with a wet sponge. Once the grout sets, polish the tiles with a dry cloth. Sealing the grout is the final step in how to install tile shower and prevents stains or mildew. Use a sealer designed for bathrooms and apply it carefully across all grout lines. A sealed shower will last longer and need less maintenance. Maintenance Tips for Long-Lasting Results After your tile shower is installed, regular upkeep keeps it looking great. Clean the grout lines weekly with a soft brush and mild cleaner. Avoid bleach or harsh chemicals that can weaken the tile or grout. In Santa Fe, hard water stains are common, so dry the tiles after each shower. When combined with smart design choices like vinyl installation in dry zones and hardwood floor installation in nearby hallways, your bathroom will look stunning and stay functional for years. Always inspect your shower for cracked grout or loose tiles and repair them early to avoid major issues. Should You Hire a Pro or DIY? If you’re still unsure how to install tile shower, consider hiring a professional. Our skilled installers handle everything from prep to sealing. Many homeowners start a DIY project but run into trouble with layout, waterproofing, or tile cutting. Professionals bring the right tools and know-how to avoid costly mistakes. If you’re already upgrading other parts of your home like flooring, you might as well bundle it with hardwood floor installation or vinyl installation for better value. A pro ensures your shower lasts for years without leaks or cracks. Final Thoughts on Tile Shower Installation By now, you’ve learned the complete steps for installing a tile shower. It’s a step-by-step process that takes planning, tools, and time. From waterproofing to grouting, each part plays a big role in the result. Whether you install it yourself or hire the experts at THE CARPET MAN, the end goal is a clean, durable, and beautiful shower. Pairing it with smart choices like vinyl installation or hardwood floor installation in other rooms can enhance your home’s look even more. Follow this guide, take your time, and enjoy a bathroom upgrade that’s both practical and stylish.
How to Prepare Your Home for Carpet Installation
Installing new carpet is one of the most effective ways to refresh and upgrade your space, but proper preparation is key to ensuring a smooth and successful installation process. Whether you’re scheduling residential carpet installation or planning a large commercial carpet installation, knowing how to get your home or business ready will save you time, money, and headaches. One common question many homeowners have is, “how long does it take to install carpet?” The time required for carpet installation depends on multiple factors, including the total square footage of the area, the specific type of carpet being installed (such as plush, Berber, or sisal), and the condition and readiness of the subfloor and surrounding space. In general, preparation is just as important as the installation itself—so let’s walk through everything you need to do before your installers arrive. 1. Understand the Timeline: How Long Does It Take to Install Carpet? Before diving into the prep work, it’s helpful to know the average installation timeline. On average, a professional crew can install carpet in a standard-sized room (about 12×15 feet) in under a day. However, larger projects or more complex flooring—such as sisal installations or jobs requiring carpet binding services—may take longer. Once again, the question arises: how long does it take to install carpet? 2. Clear the Space Thoroughly Preparing for carpet installation begins with clearing the room; be sure to remove all furnishings, wall hangings, and personal items so installers can work without interruption. That includes sofas, tables, beds, dressers, and even wall art or electronics. Some companies offer furniture removal services as part of their package, but handling this yourself can save on costs. Be sure to check with your carpet binding services or flooring contractor about their policy. 3. Remove the Old Flooring (If Required) If you’re replacing existing carpet or another type of flooring, find out whether removal is included in your quote. Many residential carpet installation services include this, but not always. 4. Check and Prep the Subfloor Carpet installs best on a smooth, dry, and even subfloor.Take time to: If your installers discover an uneven subfloor, they may need to delay the job for repairs, increasing how long it takes to install carpet in your home. 5. Take Care of Doors and Baseboards When new carpet is installed, it often changes the floor height slightly. This means doors might not swing freely afterward.Here’s what you can do: Baseboards may also need touch-ups or removal depending on how your carpet is installed. 6. Secure Pets and Children On installation day, keep pets and children away from the work area for safety. Carpet installation involves tools, adhesives, and lots of movement—distractions can lead to delays or even accidents. If you’re a pet owner, keep in mind: Create a safe, separate space for them away from the work zone. 7. Ensure Accessibility and Parking Your installers will need easy access to the home, especially if they’re carrying large rolls of carpet or equipment. Ensuring clear entry points and convenient parking can help avoid delays and reduce how long does it take to install carpet, making the process more efficient. Do the following: Making things convenient helps speed up the job and can influence how long it takes to install carpet overall. 8. Review Carpet Type and Layout Plan If you’re installing specialty materials—like sisal installations or requesting carpet binding services for stair runners or custom rugs—go over all details ahead of time. Ask your installer about: 9. Prepare for Cleanup Although most reputable installers will clean up after themselves, it’s wise to have a plan in place: 10. Plan Post-Installation Activities Once installation is complete, here’s what to do next: Final Thoughts Getting your home or office ready for carpet installation doesn’t have to be overwhelming. With the right preparation, you’ll save time and avoid stress on installation day. Taking the time to properly prepare can also help reduce delays and impact how long does it take to install carpet, especially when dealing with tight schedules. Whether you’re doing residential carpet installation in a single room or a complete commercial carpet installation, these steps will ensure your space is ready and your carpet lasts for years.
How Carpet Binding Services Can Extend the Life of Your Rugs
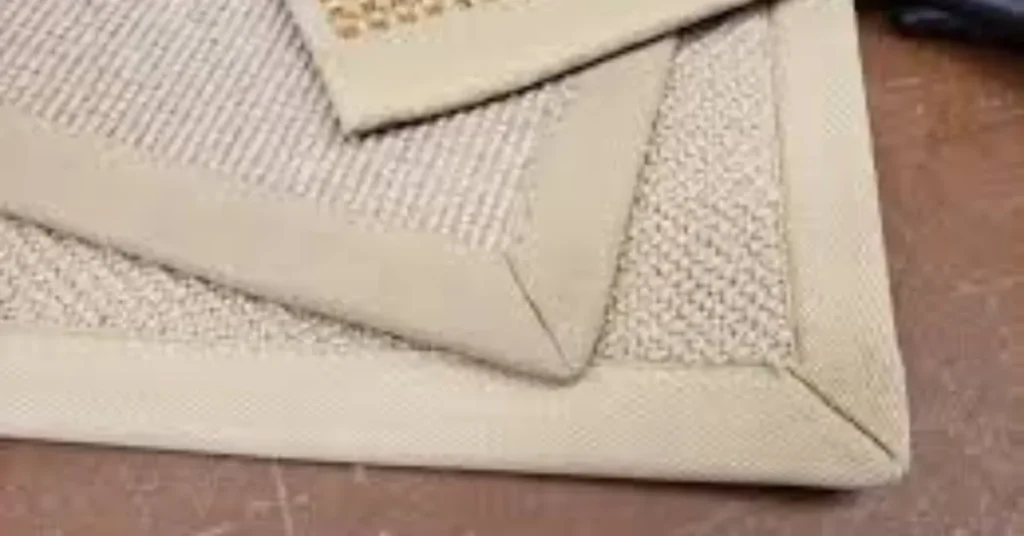
Rugs and carpets serve a functional purpose while also enhancing a room’s comfort, insulation, and visual appeal. But over time, they can start to show wear, especially at the edges. This is where carpet binding services come in. When you bind edges of carpet, you not only give your rug a clean, finished look but also protect it from further damage and fraying. If you’ve noticed your rug edges unraveling, investing in a professional carpet binding service may be the smart solution that extends its life while saving you money in the long run. What Is Carpet Binding? Carpet binding is the process of securing the bind edges of carpet or rug to prevent fraying and unraveling. When carpets are cut to size—whether for area rugs, stair runners, or custom installations—the edges can quickly become worn. Binding the edges of carpet involves sewing or gluing a durable material, like cotton, polyester, or leather, along the perimeter of the carpet. There are several techniques used in professional carpet binding services, including: Each method has its unique aesthetic and functional advantages, but they all serve the same purpose—bind edges of carpet to enhance appearance and durability. Why Should You Bind Edges of Carpet? If you’ve recently had a carpet cut to fit a new space or created a custom rug from leftover carpeting, it’s crucial to bind edges of carpet. Here’s why: Benefits of Carpet Binding for Commercial Spaces Commercial carpets face heavier foot traffic, making regular repair and maintenance essential. Carpet binding is an ideal solution for: By choosing to bind edges of carpet, businesses can reduce the need for frequent carpet replacement and ensure a clean, professional look that aligns with their branding. Additionally, bound carpets are easier to move, clean, and store—making them more versatile for changing commercial layouts. Carpet Binding vs. Carpet Repair: What’s the Difference? While related, carpet binding and carpet repair are two distinct services. Binding is focused specifically on edge protection and aesthetics, helping to bind edges of carpet for a clean, durable finish, while repair may include patching holes, fixing seams, or replacing damaged sections. In many cases, both services go hand-in-hand. For example, if a section of your carpet is damaged near the edge, you might first need a repair followed by a binding service to prevent the issue from recurring. Similarly, if you’re reusing old carpet remnants, a carpet stretching service may help remove creases before finishing with binding. DIY Carpet Binding vs. Professional Services It’s possible to purchase DIY carpet binding kits from home improvement stores. While this may be suitable for small projects or low-traffic areas, it doesn’t compare to the durability and appearance of a professional carpet binding service. Pros of Professional Carpet Binding: If you’re binding a large area rug or planning to use the carpet in high-traffic or commercial settings, it’s always better to opt for expert help. Professionals know how to bind edges of carpet properly, ensuring maximum longevity and visual appeal. How to Maintain a Bound Carpet or Rug Once you’ve bound the edges of your carpet, simple care and maintenance can extend its life even further: With proper care, a bound carpet can stay in great condition for years, even in busy areas. Final Thoughts Binding the edges of your carpet is a simple yet highly effective way to add years to your rug’s life. Choosing to bind edges of carpet not only prevents fraying but also enhances the rug’s overall appearance. Professional carpet binding adds both durability and visual appeal to repurposed or aging rugs. For homeowners, it means less waste and more savings. For businesses, it ensures a professional appearance and extended flooring lifespan.
How Long Does Carpet Installation Take? A Homeowner’s Timeline
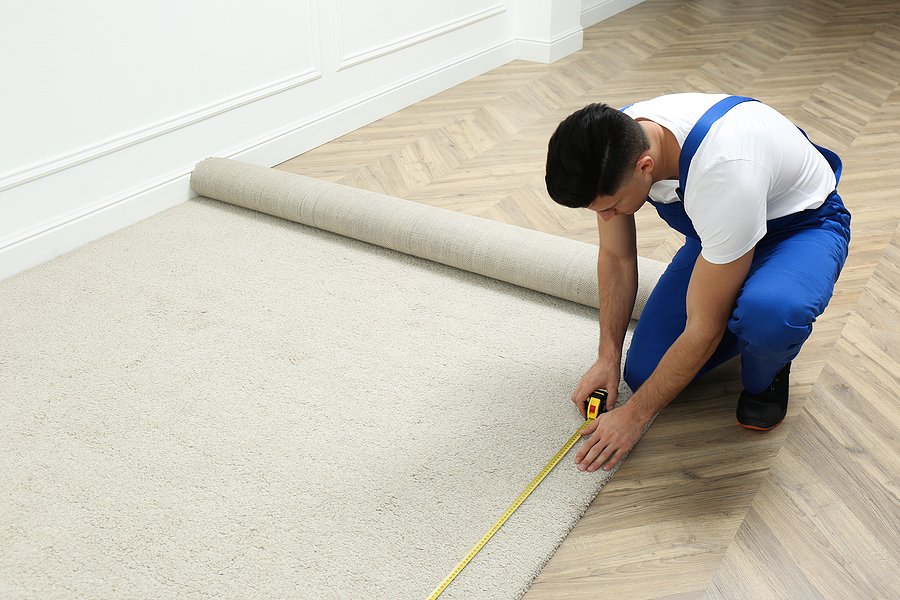
If you are getting new carpet in your home, you are probably wondering how long the installation will take. Whether you are preparing for guests or just want your home to feel cozy again it is helpful to know what to expect. The good news is that carpet installation does not usually take too long. With the right team and some simple planning your project can move smoothly and quickly. In this guide we will walk you through the full process of carpet setup. We will explain what happens before during and after the installation so you can plan ahead with confidence. Measuring and Choosing Your Carpet Before anything is installed you will need to choose the right carpet for your home. This is a very important step. The Carpet Man Company offers many styles textures and colors so you can find the perfect match for your space. Next a professional will come out to measure your rooms. This helps make sure the installers bring the right amount of carpet and supplies. The measuring appointment usually takes less than an hour depending on how many rooms you are carpeting. Time needed: 1 day to choose your carpet and schedule a measurement. Getting Your Home Ready Before the installation team arrives you will need to prepare the area. That means moving furniture and breakable items out of the rooms getting new carpet. If you need help some companies offer furniture moving services for an extra fee. You may also need to remove old carpet or flooring unless your installer handles it. This step is important because a clean empty space helps the installers work faster and more safely. Time needed: 1 to 2 days depending on how many rooms and how much help you have. Delivery of the Carpet and Materials Once your carpet is selected and your rooms are ready the carpet and tools are delivered. Sometimes this happens the same day as installation but other times it might arrive a day early. This gives the carpet a chance to settle and adjust to the room temperature which helps with a better fit during installation. Time needed: Usually same day or 1 day before installation. The Carpet Installation Day This is the big day. When your professional installers arrive they will begin by removing any old carpet or flooring unless that has already been done. Then they prepare the floor by cleaning and making sure it is even. Next they roll out the new carpet cut it to size and stretch it tightly so there are no wrinkles. They use special tools to secure it in place along the edges of the walls. Finally they trim the edges and clean up any mess. Most carpet installations are completed in one day. A single room might only take 1 to 2 hours while a whole house could take 4 to 8 hours. Larger or more complex jobs could take a full day or even two. Time needed: 1 to 2 days depending on the size and number of rooms.After the Carpet is Installed After your new carpet is installed you may need to wait a few hours before walking on it. This gives it time to settle and makes sure it stays in place. You should also avoid moving heavy furniture right away. The installers will clean up after themselves but you may want to vacuum the carpet once or twice after 24 hours. This helps remove any small loose fibers. If there are any smells from the new carpet or glue just open the windows and let fresh air in. The smell usually goes away in a day or two. Time needed: Light use after a few hours full use after 24 to 48 hours. Common Questions About Carpet Installation 1. Will it take longer for stairs? Yes stairs usually take more time because each step must be measured cut and fitted carefully. Add an extra hour or two for stair installation. 2. What if I have furniture I cannot move? Some companies like The Carpet Man Company can move furniture for you. Ask about this service when booking your installation. 3. Can I stay at home during the installation? Yes but it is best to stay out of the way to let the team work quickly. Keep pets and children in another room for safety. 4. Will the installers take away the old carpet? Most companies will remove and dispose of the old carpet for you but ask ahead to confirm if this service is included. What Can Affect the Timeline? Several things can make the process take a little longer. These include: The Carpet Man Company helps make sure your project stays on schedule. They offer experienced installers and great customer support so you always know what to expect. Final Thoughts: A Simple Process With Lasting Results Installing new carpet is an exciting way to refresh your home. From picking out your favorite color to enjoying the soft feel under your feet it is worth the time and planning. Whether you are updating one room or the entire house The Carpet Man Company makes the process smooth and stress free. Their team is experienced friendly and focused on quality. If you are looking for dependable flooring professionals who care about great results and customer service consider working with THE CARPET MAN for your next home project.
Is Your Carpet Wrinkled or Loose? Here’s How Carpet Stretching Fixes It
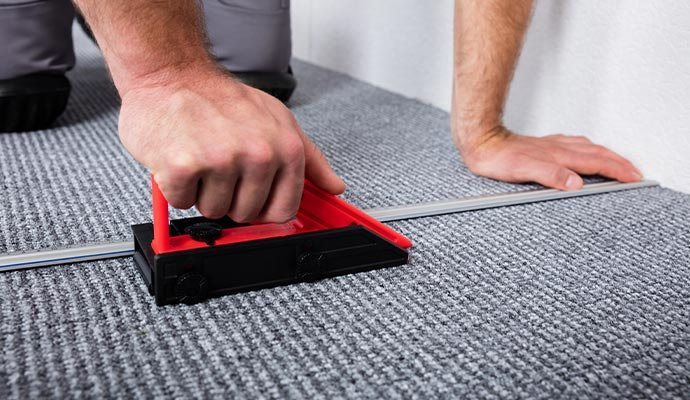
Over time, even well-installed carpets can start to look less than perfect. You might notice ripples, waves, or areas where the carpet feels loose or uneven. These imperfections not only affect the appearance of your home but can also create safety concerns. The good news is that you likely don’t need to replace your carpet entirely. Instead, a process called carpet stretching can restore it to a smooth, like-new condition. In this guide, you’ll learn what causes carpet to loosen, how carpet stretching works, and why it’s an effective solution for extending the life of your floors. What Is Carpet Stretching? Carpet stretching is a consultant service designed to eliminate wrinkles, bumps, and loosened areas in wall-to-wall carpeting. During installation, carpet is typically pulled tight and secured along the edges using tack strips. However, as time passes, it can lose that tension. When this happens, a technician uses specialized tools to pull the carpet back to its original tension and re-secure it. This not only improves the appearance of the carpet but also prevents damage that could lead to early replacement. What Causes Carpet to Wrinkle or Loosen? Carpet doesn’t wrinkle without reason. Several common factors can lead to loose or rippled flooring: Understanding the cause of the problem helps ensure the solution is long-lasting. How Does Carpet Stretching Work? When a carpet becomes loose, professionals follow a series of steps to stretch and smooth it. Here’s what typically happens during a carpet stretching appointment: 1. Initial Evaluation The technician inspects the carpet, checking for problem areas and determining the best approach. 2. Clearing the Space Furniture and other items must be moved so the entire carpet can be accessed. Some companies offer to do this for you, while others may ask that the area be cleared in advance. 3. Detaching the Carpet The carpet is gently lifted from the tack strips along the edges. This step is done carefully to avoid damage. 4. Stretching the Carpet Using a power stretcher, the technician pulls the carpet tight. This tool ensures even tension across the room, which is essential for long-lasting results. 5. Trimming and Securing Any extra carpet is trimmed, and the material is reattached securely to the tack strips. If necessary, seams are resealed or adjusted. 6. Final Inspection The technician checks to ensure the carpet lies flat and looks smooth. Once approved, furniture is returned to its place. This entire process can typically be completed within a few hours, depending on room size and the amount of work needed. How Do You Know When You Need Carpet Stretching? It’s not always obvious when your carpet needs attention, but there are a few telltale signs:Visible ripples or waves These signs should not be ignored. Delaying stretching can lead to permanent damage or cause someone to trip and fall. Is Carpet Stretching a DIY Job? While there are DIY tools available, stretching a carpet properly is best left to professionals. Most homeowner kits only include knee kickers, which are not effective for achieving consistent tension in large spaces. Trained technicians use power stretchers and have the experience needed to avoid damaging the carpet. Attempting the job yourself could lead to uneven results or even make the problem worse. Why Carpet Stretching Is Worth It Choosing to stretch your carpet in place of replacing it comes with several clear benefits: For many homeowners, carpet stretching is a smart, low-cost way to refresh their space. How Often Should You Stretch Your Carpet? There’s no set timeline for carpet stretching. Some carpets may never need it, while others develop wrinkles within a few years. If the original installation was done properly with a power stretcher, the carpet may hold up for a decade or more. However, if you start seeing ripples or bumps, it’s time to take action. The sooner you address the issue, the easier and more affordable the fix. Final Thoughts Loose, wrinkled carpet doesn’t mean you have to start over. In most cases, a skilled carpet stretching service can make your floors look clean, flat, and well-maintained again. It’s a fast, affordable solution that enhances both appearance and safety. If you’re in or around Santa Fe, NM and you’re dealing with carpet issues, THE CARPET MAN offers expert carpet stretching services that can change your flooring to its best condition. With professional tools and a commitment to quality, their team can help you protect your investment and enjoy a smooth, comfortable floor once again.
Your Guide to the Best Flooring Stores Santa Fe

Introduction: Why Flooring Matters More Than Ever Whether you’re building a new home, updating a historic adobe, or remodeling a downtown condo, flooring plays a huge role in both the function and personality of your space. In Santa Fe, where the architecture and lifestyle are rich in character and natural charm, choosing the right floors starts with finding the right flooring stores Santa Fe. It’s more than just a home improvement — it’s a statement of style and culture. Thankfully, Flooring Stores Santa Fe homeowners trust offer an incredible variety of high-quality materials and expert guidance to make sure every room in your home looks and feels exactly the way you want it to. This article breaks down how to choose the right store, what flooring types are trending in Santa Fe, and what you should know before making a final decision. Why Choose Local Flooring Stores in Santa Fe? Shopping local doesn’t just support the community; it often gives you better value, more personalized service, and access to products that suit the local style and climate. Here’s why local flooring showrooms are worth your time: Unlike big-box chains, the best flooring stores Santa Fe has to offer pride themselves on building relationships, not just making sales. Top Flooring Types Popular in Santa Fe Homes In 2025, Santa Fe homeowners are choosing flooring materials that offer both durability and design harmony with their Southwestern surroundings. Here are a few top favorites: 1. Hardwood Flooring Classic, warm, and long-lasting, hardwood continues to be a top choice. It’s especially beautiful in traditional and rustic homes. Many hardwood flooring stores in Santa Fe offer oak, maple, hickory, and even reclaimed wood options for a more eco-friendly approach. 2. Luxury Vinyl Plank (LVP) If you want the look of wood but need something waterproof and scratch-resistant, luxury vinyl is ideal. It’s perfect for busy families, pet owners, or areas with heavy foot traffic. 3. Tile Flooring Tile is a timeless favorite in Santa Fe due to its durability and cooling properties during hot months. From ceramic and porcelain to traditional Saltillo tiles, the design possibilities are endless. 4. Carpet Flooring For bedrooms and cozy spaces, carpet adds warmth and comfort. Modern styles include textured weaves and stain-resistant options that stand the test of time. How to Choose the Right Flooring Store in Santa Fe Not all flooring stores are created equal. Here are a few qualities to look for when choosing the best partner for your project: Before committing, don’t hesitate to ask questions about warranties, delivery times, or custom orders. Tips for Shopping Smart A little prep goes a long way when shopping for flooring. Keep these tips in mind to avoid mistakes and make confident decisions: Installation: DIY or Hire a Pro? Flooring installation is no small task. While some DIY-savvy homeowners might take on projects like peel-and-stick tiles or click-lock vinyl, most flooring materials, especially hardwood and tile, require professional installation for best results. That’s where local stores have a major advantage. Many top flooring contractors in Santa Fe are affiliated with or recommended by local retailers. You get the benefit of consistent communication and accountability from start to finish. Mistakes to Avoid Here are some of the most common pitfalls homeowners experience when buying flooring: Taking the time to talk through these issues with flooring experts can save you time and money in the long run. Why The Carpet Man Santa Fe Is a Trusted Choice When it comes to flooring knowledge, variety, and top-notch service, The Carpet Man has earned its reputation as one of the most respected flooring stores Santa Fe has to offer. With a wide selection of luxury vinyl flooring Santa Fe homeowners love, as well as premium carpeting, hardwood, and tile options, The Carpet Man combines big-city expertise with small-town friendliness. Whether you’re remodeling a single room or upgrading your entire home, their team is ready to help you find flooring that fits your lifestyle, aesthetic, and budget. Final Thoughts: Elevate Your Home One Floor at a Time Choosing the right flooring is one of the most rewarding investments you can make in your home. From durability and design to warmth and value, flooring ties together every element of your living space. So if you’re ready to explore the top flooring stores in Santa Fe has to offer, make sure you come prepared with a vision, a budget, and a willingness to explore all the incredible textures, colors, and materials available today.
Hardwood Floor Installation Tips: Everything You Need to Know for a Flawless Finish
Hardwood Floor Installation Tips Hardwood flooring is a great way to enhance your home’s beauty and increase its overall value. However, a successful installation requires careful planning, precision, and a clear understanding of best practices. Whether you’re a DIY enthusiast or hiring professionals, following proven hardwood floor installation tips will help ensure your flooring looks stunning and lasts for years. In this guide, you’ll discover practical tips on preparation, tools, techniques, and maintenance—all essential for a smooth and durable hardwood flooring installation. Why You Should Follow Hardwood Floor Installation Tips Many homeowners make the mistake of thinking that hardwood floor installation is straightforward. While it’s not impossible to DIY, small errors can lead to big issues like warping, gapping, squeaking, and costly repairs. These hardwood floor installation tips are designed to help you avoid common pitfalls and achieve professional-grade results the first time. 1. Choose the Right Type of Hardwood Flooring Before anything else, you must choose between solid hardwood and engineered hardwood. Each has pros and cons depending on where you plan to install it. Solid Hardwood Milled from a single piece of wood Can be sanded and refinished multiple times Ideal for living rooms and bedrooms Engineered Hardwood Made of multiple layers with a hardwood veneer More resistant to humidity and temperature changes Perfect for basements or areas with moisture Hardwood Floor Installation Tips for Material Selection: Avoid installing solid wood below grade (like basements) Choose engineered wood for better moisture resistance Match the wood species to your interior design and durability needs 2. Let the Flooring Acclimate Before Installation One of the most important hardwood floor installation tips is to let the wood acclimate to your home’s environment. How to Acclimate Hardwood Flooring: Leave the boxes open in the installation room for 3–5 days Maintain room temperature between 60°F to 80°F Keep relative humidity between 30% to 50% 3. Inspect and Prepare the Subfloor A clean, dry, and level subfloor is the foundation of a successful installation. Failing to inspect or prepare it properly can cause uneven boards and squeaky floors. Checklist for Subfloor Preparation: Remove dust, dirt, and debris Use a moisture meter to check subfloor dryness Smooth high areas with sanding or fill in any low spots Install a vapor barrier on concrete subfloors Hardwood Floor Installation Tips for Subflooring: Use a leveling compound for uneven concrete For wood subfloors, ensure all nails are set and there’s no movement Address any moisture problems before installation 4. Gather the Right Tools and Supplies Before beginning the job, gather all necessary tools and materials to avoid interruptions during installation. Tools You May Need: Flooring nailer or stapler Moisture meter Tape measure and chalk line Circular or miter saw Rubber mallet Wood glue (if using glue-down method) Spacers for expansion gaps 5. Plan the Layout Carefully Don’t rush into laying the first board. Mapping out your layout in advance can help avoid uneven cuts, awkward gaps, and aesthetic problems. Layout Planning Tips: Lay planks parallel to the room’s longest wall Center the flooring to avoid thin planks at edges Stagger seams by at least 6 inches for structural integrity Hardwood Floor Installation Tips for Layout: Use a chalk line to maintain alignment Dry-fit the first few rows before permanently securing them Blend planks from multiple boxes to ensure a natural color variation 6. Leave Expansion Gaps Around the Room Wood expands and contracts with humidity changes. To accommodate this movement, leave a small expansion gap between the flooring and the walls. Standard Gap Size: 1/4″ to 1/2″ around all walls and fixed objects You can later cover these gaps with baseboards or quarter-round moldings. 7. Select the Right Installation Method Hardwood flooring can be installed using three primary methods: nailing, gluing, or floating the planks in place. Nail-Down: Suitable for solid hardwood over wood subfloors Requires a flooring nailer or stapler Glue-Down: Ideal for engineered hardwood over concrete Use high-quality adhesive to prevent gaps Floating: Click-lock systems that “float” above the subfloor Best for DIY projects and quick installations Hardwood Floor Installation Tips by Method: Make sure the glue you use is suitable for the type of flooring being installed. For nail-down, use the correct nail size and spacing Always read the manufacturer’s recommendations 8. Mix Planks for a Natural Look Every hardwood plank features unique grain, color, and texture characteristics. Steps: Open 3–5 boxes at a time Shuffle and lay them out before installing Avoid placing similar patterns or shades side by side 9. Clean the Work Area Frequently A clean installation space helps prevent dirt from getting trapped under planks, which can cause lumps or noise. Pro Tips: Sweep or vacuum between each stage Keep tools organized to avoid accidents Wipe adhesive spills immediately 10. Finishing Touches and Post-Installation Care Once the flooring is installed, take the necessary steps to protect it. Post-Installation Tips: Avoid walking on glue-down floors for 24–48 hours Install transition strips between rooms Clean with a wood-safe cleaner only Hardwood Floor Maintenance Tips After Installation Maintaining your floor properly ensures it lasts for decades. Long-Term Care Suggestions: Use rugs and doormats to reduce dirt Add felt pads under furniture legs Refinish your floor every 7–10 years as needed Common Mistakes to Avoid Avoiding rookie mistakes can save you money and hassle. Skipping acclimation Ignoring subfloor moisture issues Forgetting expansion gaps Failing to read product instructions Using the wrong tools or adhesives Each of these errors can be prevented by following the hardwood floor installation tips outlined in this article. FAQs About Hardwood Floor Installation Q1. Can I install hardwood flooring myself?Yes, but it requires careful planning and the right tools. DIY is feasible for floating or click-lock systems. Q2. How long should hardwood flooring acclimate?At least 3–5 days, depending on your region’s climate and flooring type. Q3. Should I glue or nail hardwood floors?That depends on your subfloor and flooring type. Nail-down is common for solid wood; glue-down works well for engineered wood on concrete. Q4. What’s the most important step